|
| | Project INBRED ALLIS CHALMERS |  |
|
+14truckin42 thatrandomguy Chopperhed matthew sidor MSteele323 CraftsmanKid1 CityRedneck W1ldyOvvnZ DICE464 F150F250F350 AcreFarm Jordan dangeroustoys56 muddstir 18 posters | |
| Author | Message |
|---|
muddstir
Member

2018 Build-Off Entrant
2018 Build-Off Entrant
Join date : 2012-01-22
Posts : 318
 |  Subject: Re: Project INBRED ALLIS CHALMERS Subject: Re: Project INBRED ALLIS CHALMERS  March 28th 2013, 6:36 pm March 28th 2013, 6:36 pm | |
| Had some time to work on the tractor, and I'm now ready to get the steering hooked up. The last thing I did was I got the dash pcs fixed up and mounted. Now with them being plastic I wanted to put a support structure inside of them, that would allow me to mount the steering column firmly to frame work - give the hood something to sit on when closed ( i'm going to make the hood open alittle differently) - and should support the dash pcs in a rool over. I took some 3/4 SQ tube, angled cut it, then welded it back together in a hoop. Then took some more tube and bent some angled up right supports to really lock the structure down. This framework is not done yet but its as far as needed to get the steering hooked up. Here are some pics - the first one is of the support and the second one is of it half way covered by the dash pcs. [img] 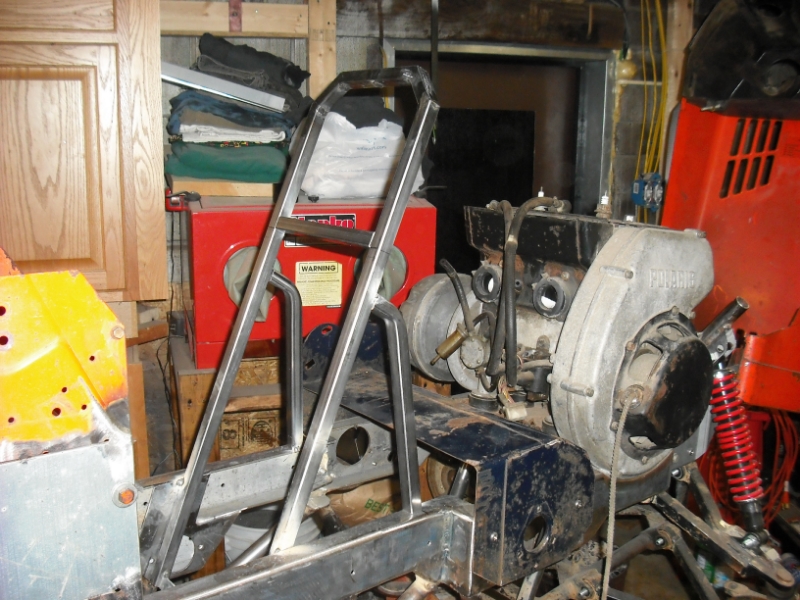 [/img] [img] 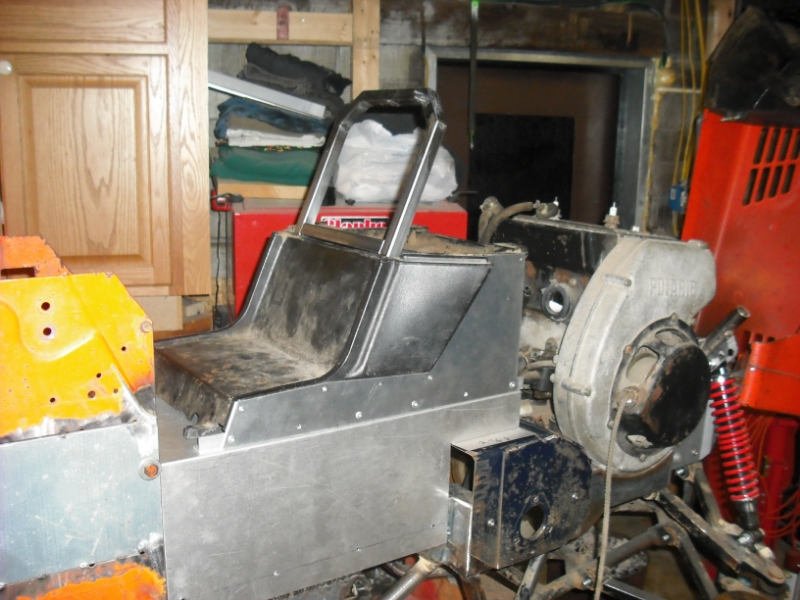 [/img] | |
|   | | truckin42
Veteran Member

2014 Build-Off Entrant
2014 Build-Off Entrant
Age : 26
Join date : 2012-10-04
Points : 5500
Posts : 1070
 | |   | | W1ldyOvvnZ
Member

Age : 28
Join date : 2011-12-06
Points : 5248
Posts : 499
Location : Winchester, ON, Canada
 | |   | | muddstir
Member

2018 Build-Off Entrant
2018 Build-Off Entrant
Join date : 2012-01-22
Points : 5034
Posts : 318
Location : Western,PA
 |  Subject: Re: Project INBRED ALLIS CHALMERS Subject: Re: Project INBRED ALLIS CHALMERS  March 29th 2013, 11:52 pm March 29th 2013, 11:52 pm | |
| Thanks truckin42 and W1ldyOvvnZ.
There will be alot more updates now that my kitchen project is just about wraped up.
This weekend I'm hoping that I get the steering column mounted in place. | |
|   | | truckin42
Veteran Member


2014 Build-Off Entrant
2014 Build-Off Entrant
Age : 26
Join date : 2012-10-04
Points : 5500
Posts : 1070
 | |   | | redlinemotorsportts
Moderator


2014 Build-Off Entrant
2014 Build-Off Entrant
Age : 27
Join date : 2013-03-18
Points : 7480
Posts : 3131
Location : raleigh nc
 | |   | | muddstir
Member


2018 Build-Off Entrant
2018 Build-Off Entrant
Join date : 2012-01-22
Points : 5034
Posts : 318
Location : Western,PA
 |  Subject: Re: Project INBRED ALLIS CHALMERS Subject: Re: Project INBRED ALLIS CHALMERS  June 12th 2013, 11:09 pm June 12th 2013, 11:09 pm | |
| - redlinemotorsportts wrote:
- Very cool build. Any progress?
 Unfortunately no, life got busy and had no time to mess with it. The only time that I get to touch it is when I'm pushing it across the garage, and to tell the truth I'm not sure when I will be able to mess with it again. There are a few more house projects that I need to get done before I can get back on this one.
Last edited by muddstir on December 14th 2013, 12:29 am; edited 1 time in total | |
|   | | muddstir
Member


2018 Build-Off Entrant
2018 Build-Off Entrant
Join date : 2012-01-22
Points : 5034
Posts : 318
Location : Western,PA
 |  Subject: Re: Project INBRED ALLIS CHALMERS Subject: Re: Project INBRED ALLIS CHALMERS  December 14th 2013, 12:29 am December 14th 2013, 12:29 am | |
| Been working on this dust magnet lately. Didn't get much done but got enough to post about. Still trying to get the steering connected. Step 1- had to buy a steering stem that was meant for the atv frame that was used. Then I mocked it up to how it would have been placed in the atv frame. Issue #1 was the atv supported the steering stem mostly buy the upper mount the bottom mount was only a flange bearing but I only need the very bottom (3in) of the steering stem. So I had to find a way to support the bottom section of the stem but I have only 3in's of space (top side) to work in, and that is need to install some type of u-joint. So I went off of the bottom side of the steering stem. I welded in a brace in, then welded two locking collars to the brace, then the bottom of the steering stem got a bolt welded to it, then the locking collars got a bronze bushing installed. When the steering stem is sat into place the bolt goes in the bushing and holds everything in place. Had to make it kinda small though, down the road a front diff will have to place in that area.   " />  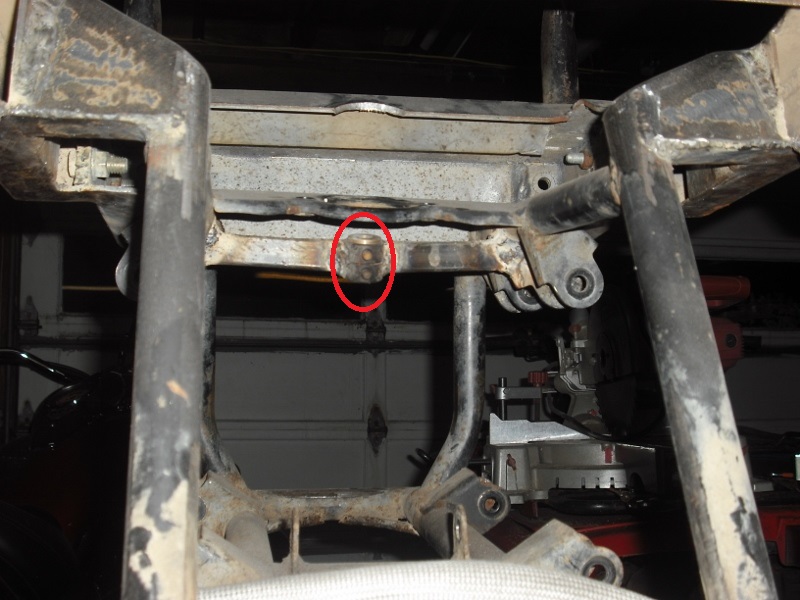 " />   " /> Then I drilled a 5/8 hole on the top end of the steering stem so I could use a 5/8 pin to attch some steering u-joints I found on the net.  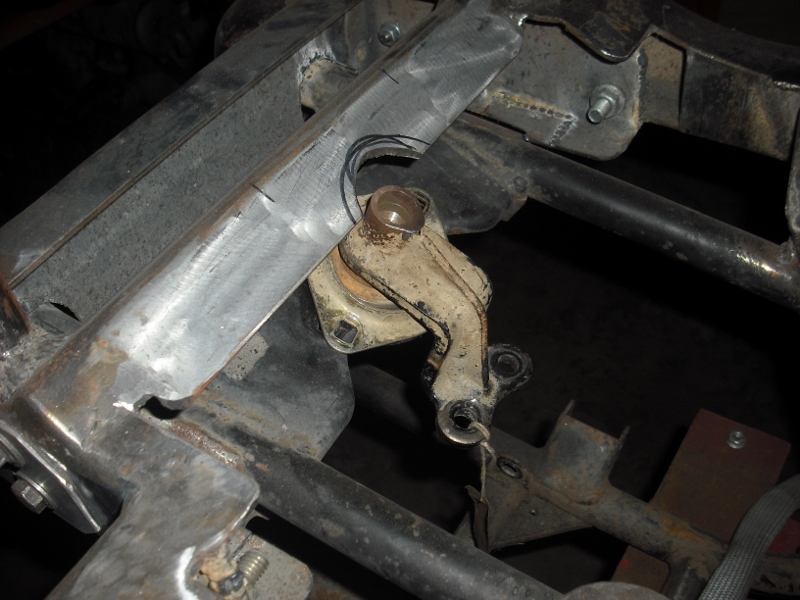 " /> These are the steering u-joints (pin and block style) I found on the net made by Borgeson. The have a 5/8 bore on one side and 1/2 bore on the other. They will work perfect - Not - after buying 2 a t 47 bucks each. So that gave me Issue #2 (next post tomorrow).  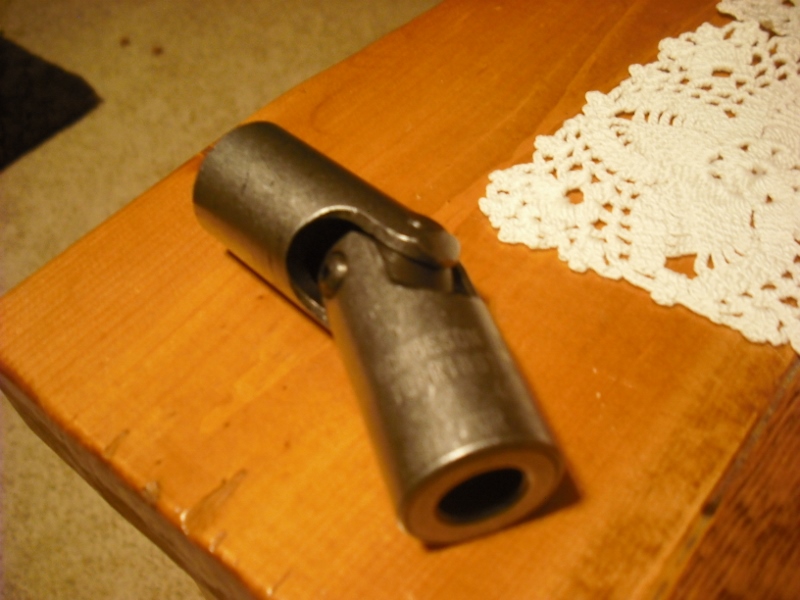 " /> | |
|   | | Creepycrawler
Established Member


2024 Build-Off Entrant
2024 Build-Off Entrant
Age : 37
Join date : 2013-07-02
Points : 5016
Posts : 731
Location : Logan Ohio
 | |   | | redlinemotorsportts
Moderator


2014 Build-Off Entrant
2014 Build-Off Entrant
Age : 27
Join date : 2013-03-18
Points : 7480
Posts : 3131
Location : raleigh nc
 | |   | | xxXMowerdudeXxx
Established Member

2014 Build-Off Entrant
2014 Build-Off Entrant
Join date : 2013-01-28
Points : 4934
Posts : 599
 | |   | | muddstir
Member


2018 Build-Off Entrant
2018 Build-Off Entrant
Join date : 2012-01-22
Points : 5034
Posts : 318
Location : Western,PA
 |  Subject: Re: Project INBRED ALLIS CHALMERS Subject: Re: Project INBRED ALLIS CHALMERS  December 22nd 2013, 4:05 pm December 22nd 2013, 4:05 pm | |
| Thanks guys.
Redline - I thought about using gears, but the only way that I could make them work would be to go over the top of the motor. Id like to keep the area above the motor open so I can rebuild the top end while its still in the tractor | |
|   | | muddstir
Member


2018 Build-Off Entrant
2018 Build-Off Entrant
Join date : 2012-01-22
Points : 5034
Posts : 318
Location : Western,PA
 |  Subject: Re: Project INBRED ALLIS CHALMERS Subject: Re: Project INBRED ALLIS CHALMERS  December 22nd 2013, 7:34 pm December 22nd 2013, 7:34 pm | |
| To solve issue #2 I went ahead and bought a used steering kit off of BMI karts and also got an additional steering shaft with u-joints.   " /> I then took the half shaft that was on the steering rod thingy and cut it as close to the u-joint as possible. it left me with hat I call a double d hole.  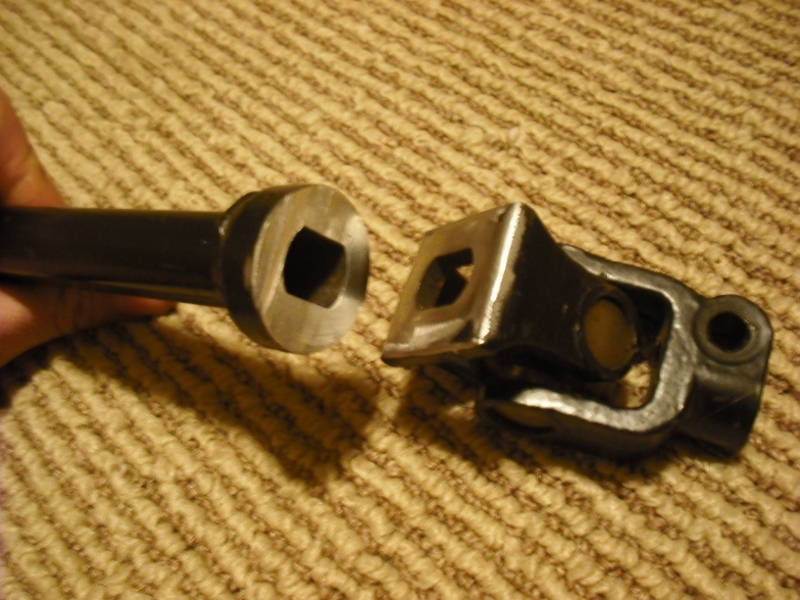 " /> Instead of just welding a rod in that oblong hole I dug in my pile of misc auto parts and found an old (I think it was a astro van) steering shaft that had the part that I needed to connect the atv stem with the u-joint part. One end was 5/8 round and the other end had the size of double d that I needed.  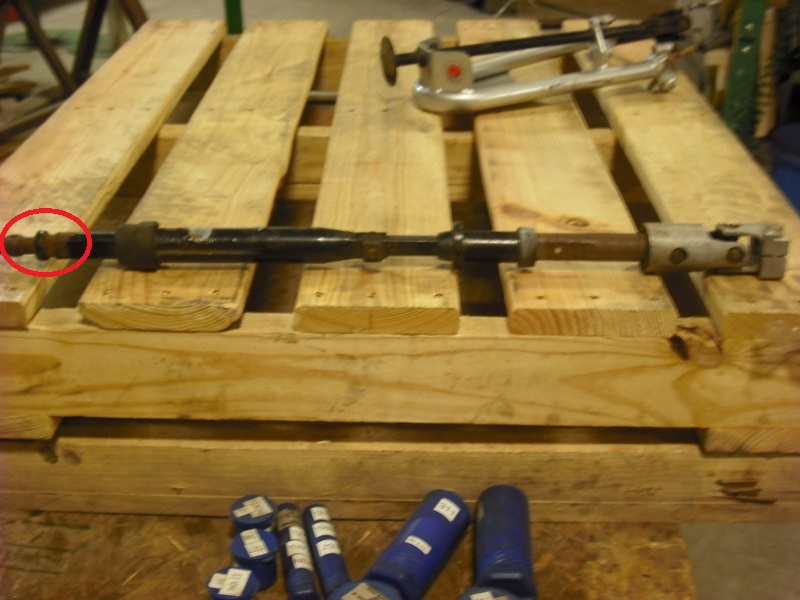 " />  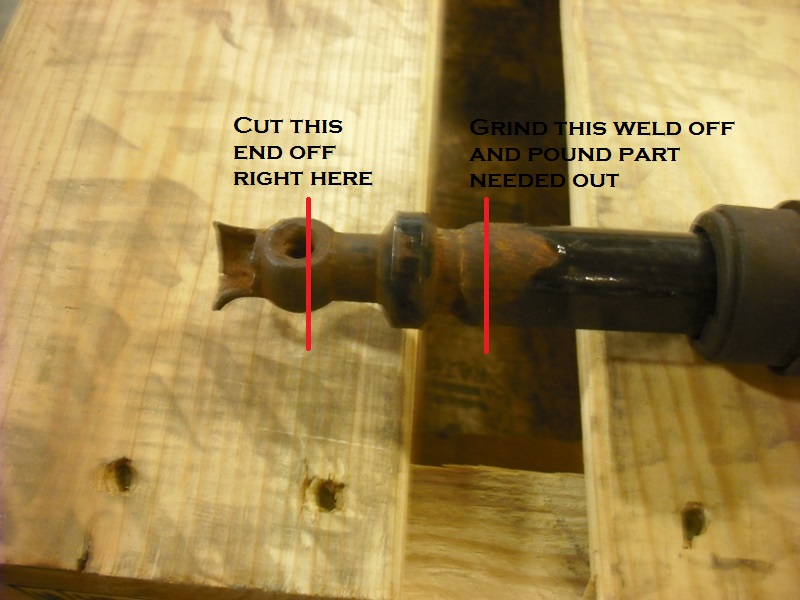 " /> So I cut the little part out and made sure it was going to work. There is still a lot of grinding to make it fit correctly.  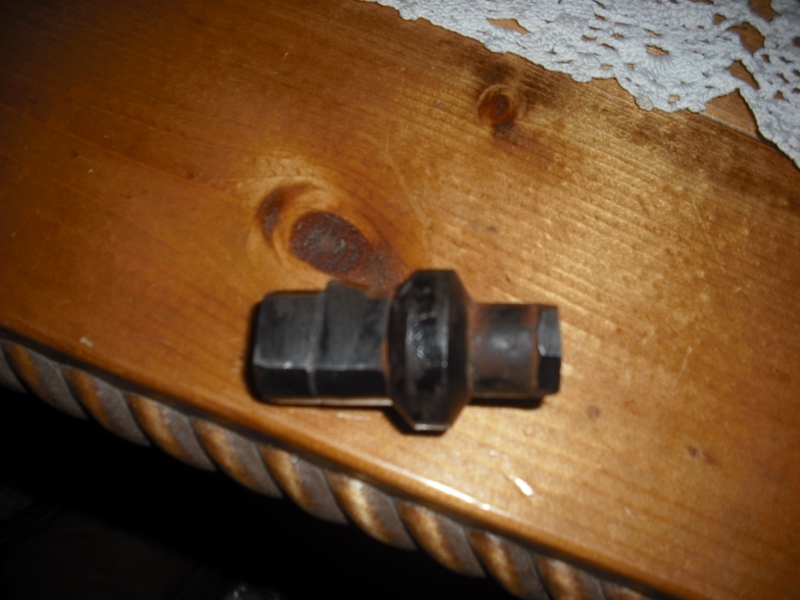 " />   " /> Got it down to shape but still have to cut it to size.  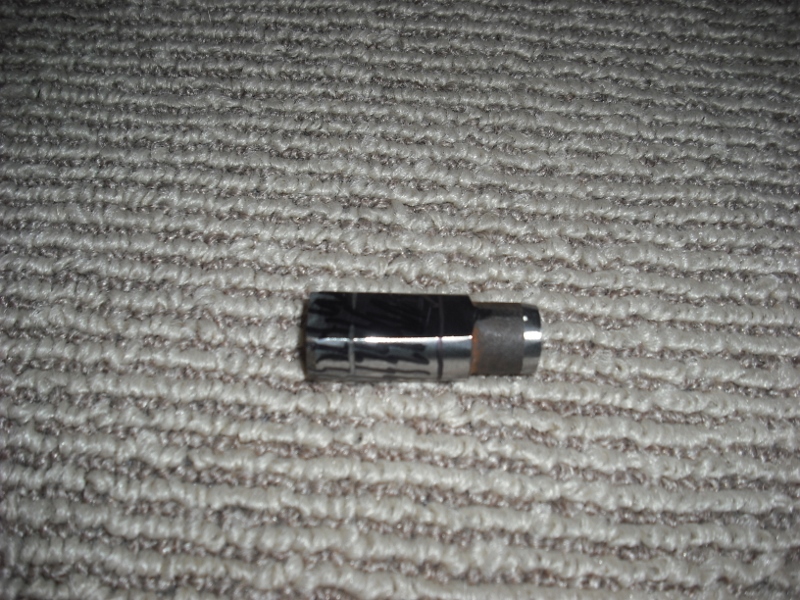 " />   " /> I went ahead and got the adapter cut to size and tig it into the atv steering stem part. The u-joint sits over the double d end and that locks it together,(I will be welding a little brace between the u-joint and the steering stem part to really lock them together.) Then if I ever need to change out the u-joint I can cut the little brace, pull off the u-joint, put a new one on, retack it together, and then my steering will stay straight and true and I wont have to grind out a new connector pc.  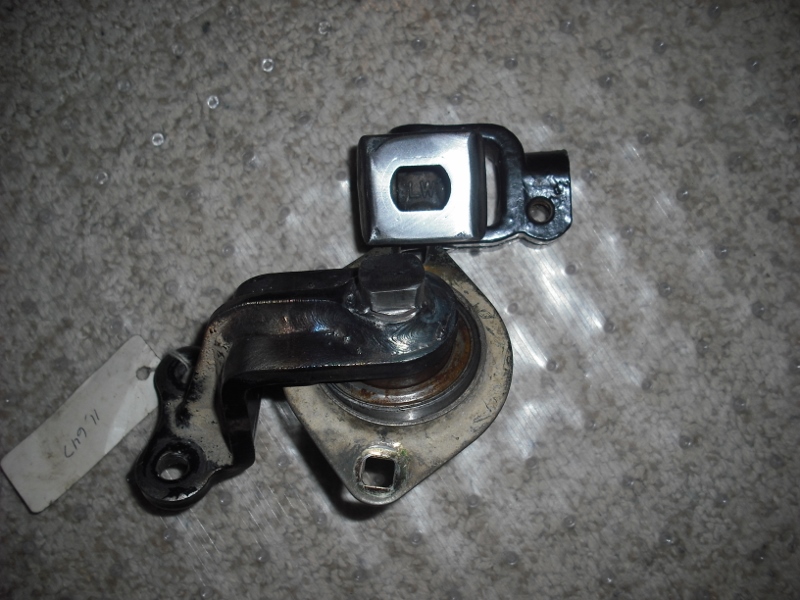 " /> | |
|   | | DirtyD
Vendor


Join date : 2014-01-09
Points : 4092
Posts : 95
 |  Subject: Re: Project INBRED ALLIS CHALMERS Subject: Re: Project INBRED ALLIS CHALMERS  January 10th 2014, 8:41 pm January 10th 2014, 8:41 pm | |
| WOW... This is one SICK build. just one question.. what atv did you use for your front/rear set up? | |
|   | | Sponsored content
 | |   | | | | Project INBRED ALLIS CHALMERS |  |
|
Similar topics |  |
|
| | Permissions in this forum: | You cannot reply to topics in this forum
| |
| |
| | Who is online? | In total there are 15 users online :: 0 Registered, 0 Hidden and 15 Guests
None
Most users ever online was 412 on January 7th 2023, 7:59 am
|
|


