|
| | Craftsman GT II My first AT Tractor |  |
|
+11crafsmankiller T-Dub13 redlinemotorsportts Creepycrawler Doc Sprocket richie thomas TheRainbowBoxer 1997 Murray Doug Lawren Wimberly Krawler86 15 posters | |
| Author | Message |
|---|
redlinemotorsportts
Moderator

2014 Build-Off Entrant
2014 Build-Off Entrant
Join date : 2013-03-18
Posts : 3131
 |  Subject: Re: Craftsman GT II My first AT Tractor Subject: Re: Craftsman GT II My first AT Tractor  January 29th 2014, 5:30 pm January 29th 2014, 5:30 pm | |
| I feel your pain. Been waiting for some big parts for my mtd (ordered 2 weeks ago) and they say the package hasnt even been processed yet. Fortunately i need to order more parts before i can use these but its seriously annoying. Ugh. Bout to start yellin'  | |
|   | | Thunderdivine
Veteran Member


Join date : 2012-12-21
Points : 6543
Posts : 2101
Location : Norway, Europe
 | |   | | Krawler86
Member


2023 Build-Off Entrant
2023 Build-Off Entrant
Join date : 2014-01-02
Points : 4154
Posts : 152
Location : PNW
 |  Subject: Re: Craftsman GT II My first AT Tractor Subject: Re: Craftsman GT II My first AT Tractor  January 29th 2014, 6:47 pm January 29th 2014, 6:47 pm | |
| - Thunderdivine wrote:
- Try 4 MONTHS!!!
Hah, i was thinking about you when i was typing that up... But at least you are setting up a container or something to be shipped over right? I just hate it when they give you an ETA, and then dont bother to inform you that half your order will be almost a month late, after paying $30 extra for faster shipping. But that being said, at least my stuff is all going over land, nothing has to take the slow boat across the ocean. | |
|   | | Krawler86
Member


2023 Build-Off Entrant
2023 Build-Off Entrant
Join date : 2014-01-02
Points : 4154
Posts : 152
Location : PNW
 |  Subject: Re: Craftsman GT II My first AT Tractor Subject: Re: Craftsman GT II My first AT Tractor  February 3rd 2014, 10:19 pm February 3rd 2014, 10:19 pm | |
| So apparently my efforts were not in vain. I gave the seller of the shafts ive been waiting for some crap on the 28th (the day they told me my 2nd shaft was not shipping until 1-31) and never got a reply. I left them lackluster feedback, nothing terrible, just C- for communication, but part(s) received were in excellent condition. Today i had a long day of public transport, running errands and such, but i came home to a box. Looked like the box my first shaft came in, but the origin was totally different. I opened it up to find, go figure, my 2nd shaft. I looked at the invoice, and i guess they didnt like what i said about them breaking my order and not telling me, so they just got on it and got my stuff out the door with the fastest possible shipping i think. It originated from Missouri, shipped the 28th (friday) and got to me, NW Oregon on the following Monday (2-3, today). I bet that was expensive! Kudos to them getting on it when i got on them, but still, meh overall satisfaction since i had to intervene anyways. But at least i can almost build my trans now.  Oooo, now i have 2 shinies. The precioussesss... 2 Brand new for the axle build, 1 good spare to carry, and a borked (still in the trans) to do something with. Maybe a brake lever pivot, or something. 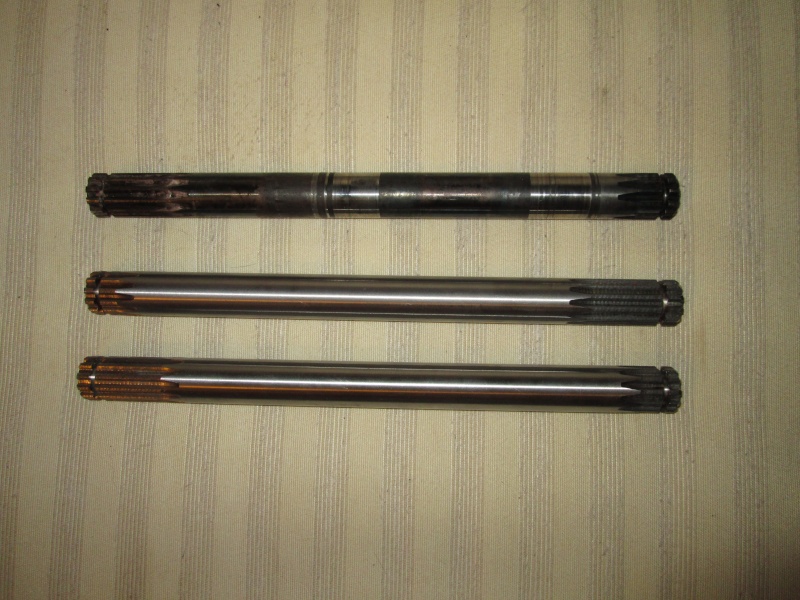 Just need to sort out a locker still. Ive had a lot of time to think and i still cant decide. I am having trouble finding the best way to fasten the side gears to the side plates of the diff. The side gears are essentially OD 2 1/8in x ID 1in x 1/2in thick. Thats the Major Dia of the 11 spline on the ID measured to the Minor Dia of the 18t gear OD. My engineering, metalurgy and stress knowledge is lacking to calc. the best number of bolts to use in the pattern, along with choosing the right bolt diameters and materials to not weaken the gear too much by drilling, but not have too small a bolt for the shear strength needed. I mean i can guess, and probably make something strong, but i want to be as strong as possible. Im guessing 6 grade 12.9 shoulders @ 8mm diameter is somewhere in the ballpark. Toyotas use 6 studs in the hub face with cone washers and grade 12.9 nuts in the front drive flanges and hubs. Those stock studs can effectively drive a 37in tire without being the weakest link. Another idea i had was to enlarge the OD of the pattern for strength, but instead of drill 6 holes through the gear face, grind out every other tooth and drill 9 holes through the side plate. Bolt the gear with 9 1/4in or 3/8in grade 8 or 12mm grade 12.9, and use a washer to spread the load a little. The forces would then be trying to bend the 9 bolt heads outwards, rather than 6 in purely shear load. I could also find something to match the OD of all the bolts to wrap them and help them from bending outwards. Along the same lines as above, i could do the same with 18 5mm grade 12.9s and just set them tight between the gear teeth. I did some rough calcs on what the back tires could posibly see in a first gear total bind @ WOT, and not counting this value is over what it takes to flip the tractor over backwards, the engine could deliver roughly 5000ft/lbs to a rear wheel. Using 5000 as a higher range estimate, always better to overbuild, the shear load if supported by 1 bolt (drilled into the face of the gear) would be neighboring 60,000 lbs. Spread over 6 bolts, 10,000lbs shear is not an unreasonable number to deal with. *note, i realize, something else would probably be exploded if i actually loaded a rear axle with 5000ft/lbs, im just using it as my safety margin* That same scenario used on 18 small bolts in a larger pattern would be about 40,000lbs, with about 2500lbs on each, also a very reasonable number to deal with. I think i like the 18bolt method, i think il dub it the 36bolt locker, by K86. Im going to go join a machinist forum or something to post up my ideas to see if i can get some more input. But im still ideaing all over the place with this thing. I like the 36bolt locker because it only involves drilling and buying hardware to vastly simplify and lock up the diff without welding and its completely removeable. Or if you explode all the bolt heads, since im not going to be running any planetaries in there, im going to fasten a wire mesh cage around the center of the diff to catch anything that might break off, and lockwire all the outsides together and to the shaft so if they all broke and came out, they would just dangle like a keyring of bolts. Please give me your ideas too. Im going to start building the transaxle up without the diff tomorrow, but the gear clusters on the shafts sat for so long in my place, with my cat, even covered since day 1, they are all covered in cat hair. So that will be a fun cleaning job, clean out all the oil residue just so cat hair isnt stuck all over. yay The diff will be the last part, since im still undecided on exactly what im going to do. That being said, the Local CC didnt want anything to do with my offroad mower, because if i hurt myself, i could hold them liable... ugh. I did my best to try and convince them it was of no concern to them, but i should have just said it was a power transfer box to a pump or something. They glazed over and went to all no's as soon as i mentioned it was an OHV. But i could always have still have a good welder burn the side gears onto the side plates with 2 or 3 passes making a 45degree fillet all the way around the gear. Thats still the last resort, if i crack a sideplate of the diff, or strip out the splines on a side gear, i have to buy a alot more than if i can just pick a new side gear or something and bolt it back up. | |
|   | | Creepycrawler
Established Member

2024 Build-Off Entrant
2024 Build-Off Entrant
Age : 37
Join date : 2013-07-02
Points : 5019
Posts : 731
Location : Logan Ohio
 |  Subject: Re: Craftsman GT II My first AT Tractor Subject: Re: Craftsman GT II My first AT Tractor  February 3rd 2014, 10:39 pm February 3rd 2014, 10:39 pm | |
| This may come off a little harsh, but I believe you are over thinking this. Just throw another pass on the gears you already have welded and call it a day. It will work just fine. Remember this is just my opinion, but Ive been running sears and wheel horses for about 5 years now with only one diff failure. If you just want to try the bolted side gears for something different then go for it, Its good to try different things, but I would have faith in the welded planetarys . Im just trying to keep ya from spending a bunch of engineering time on the rearend you could put into other cool parts of the mower.  | |
|   | | Krawler86
Member


2023 Build-Off Entrant
2023 Build-Off Entrant
Join date : 2014-01-02
Points : 4154
Posts : 152
Location : PNW
 |  Subject: Re: Craftsman GT II My first AT Tractor Subject: Re: Craftsman GT II My first AT Tractor  February 3rd 2014, 11:03 pm February 3rd 2014, 11:03 pm | |
| - Creepycrawler wrote:
- Just throw another pass on the gears you already have welded and call it a day.
I dont own a welder, nor do i have a place to weld it. So 36 bolts is like 1/20 the cost of an hours labor of a good welder. I have bits and a drill press. I want to do this with what i have, and for cheap. If i had a welder to do as i please, it would have been a done deal because my friend would have never touched the gears in the first place. I dont have faith in the sintered gears after being welded on, then ground up, then welded on again. Its already screwing with the case hardening. I took a file to the gears lightly, and some teeth are soft, some are hard. Its really inconsistent. I cant trust my entire transaxle, case and gearset to some, in my mind, questionable planet gears. I am not a fan of sintered gears in the first place, they are widely used in RC applications, and fail in strange ways when they are not totally uniform or something upset the powdered nature of the insides. My friends mediocre welding, after probing and poking with some files and a microscope, i saw porosity in the actual sintered material where it bonded with the FCAW wire. The bond surface of the welds completely interrupts the consistency of the case hardening on the sintered planets and i can see them cracking and wreaking havok. Yet with the bolt on option, i see (with lockwire) almost no chance of failure of a gear or case rupture if the bolts fail, and with one side broke loose, i can effectively drive with one wheel driven still, not at all an option if the planets crack and or fail. Bolts seem safer and cheaper, but still im looking for flaws in it. | |
|   | | Creepycrawler
Established Member


2024 Build-Off Entrant
2024 Build-Off Entrant
Age : 37
Join date : 2013-07-02
Points : 5019
Posts : 731
Location : Logan Ohio
 | |   | | Krawler86
Member


2023 Build-Off Entrant
2023 Build-Off Entrant
Join date : 2014-01-02
Points : 4154
Posts : 152
Location : PNW
 |  Subject: Re: Craftsman GT II My first AT Tractor Subject: Re: Craftsman GT II My first AT Tractor  February 6th 2014, 7:17 pm February 6th 2014, 7:17 pm | |
| Man ive been jelous for months with all the snow vids and pictures all you guys have posted. I love the snow, and unfortunately, Portland rarely gets snow for more than a few hours or 1 day. When it happens, i make the most of it. So today was going to be the day i go to the hardware store to get my bolts and whatnot for my bolton locker idea, but i woke up to snow! Sucks because now i cant go to the store, too late to make it there on the bus, theres no way my rabbit is making it up the little hill out of my parkinglot. Im not going to bust out chains for 1 quick trip to the store. Man i wish my tractor was running, i would just drive it to the hardware store. So im going to just take the bus there tomorrow, since the snow is supposed to be here until sunday. That means i get to play with RCs in the snow. Il post up my pics as soon as i get em off my camera. Argh i wish i had my 4x4 pickup, why did it have to splode..  I love driving in the snow. 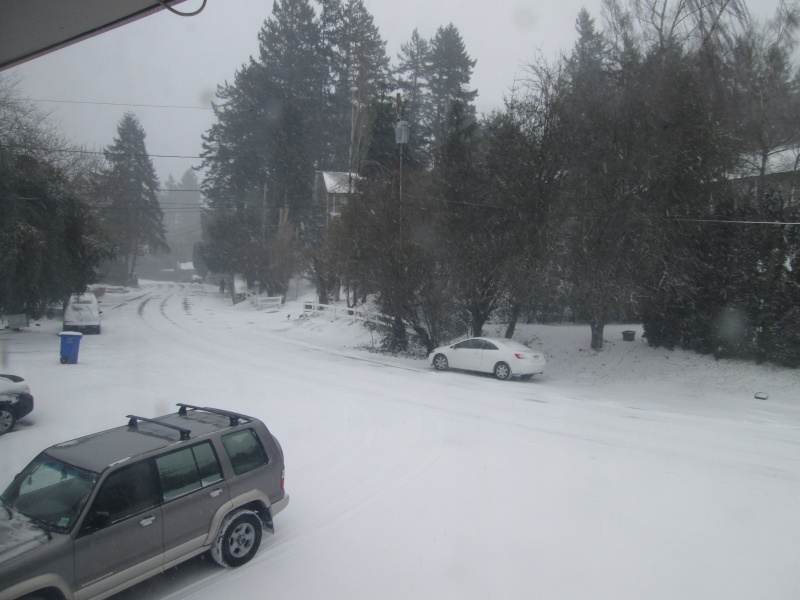 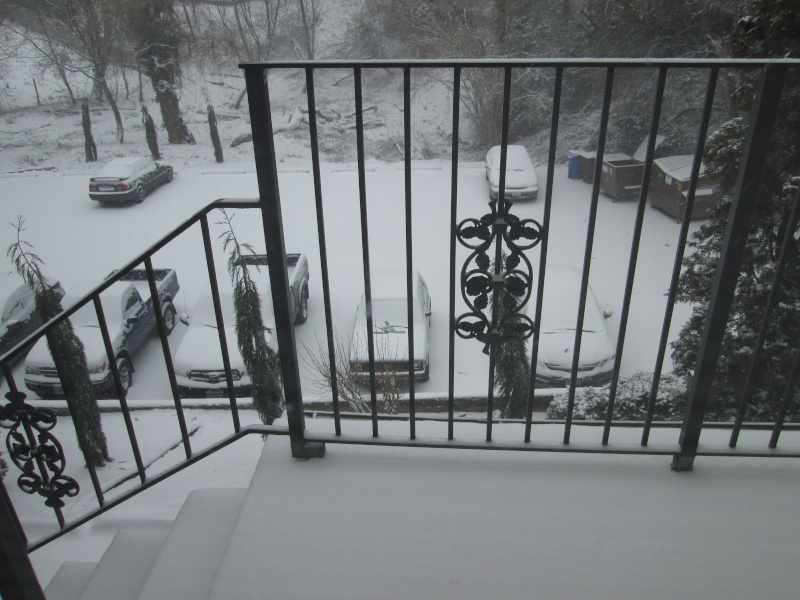 | |
|   | | LAWN MOWER MUDDER
Established Member


2014 Build-Off Top 3 Winner
2014 Build-Off Top 3 Winner
Age : 23
Join date : 2013-04-08
Points : 5209
Posts : 913
Location : Central Pa
 |  Subject: Re: Craftsman GT II My first AT Tractor Subject: Re: Craftsman GT II My first AT Tractor  February 6th 2014, 7:55 pm February 6th 2014, 7:55 pm | |
| LOL love the last pic.
Truck, Truck, RABBIT!
It's really sad that you can't e-mail snow or I would send you all of mine since you like it!! | |
|   | | redlinemotorsportts
Moderator


2014 Build-Off Entrant
2014 Build-Off Entrant
Age : 27
Join date : 2013-03-18
Points : 7483
Posts : 3131
Location : raleigh nc
 |  Subject: Re: Craftsman GT II My first AT Tractor Subject: Re: Craftsman GT II My first AT Tractor  February 6th 2014, 8:03 pm February 6th 2014, 8:03 pm | |
| Tis a dusting! My cousing in north carolina says they got 3" and schools closed for 4 days stright. Silly talk up here where we wont even think about a delay!  Diggin the rabbit.  | |
|   | | Krawler86
Member


2023 Build-Off Entrant
2023 Build-Off Entrant
Join date : 2014-01-02
Points : 4154
Posts : 152
Location : PNW
 |  Subject: Re: Craftsman GT II My first AT Tractor Subject: Re: Craftsman GT II My first AT Tractor  February 6th 2014, 9:22 pm February 6th 2014, 9:22 pm | |
| - LAWN MOWER MUDDER wrote:
- LOL love the last pic.
Truck, Truck, RABBIT!
It's really sad that you can't e-mail snow or I would send you all of mine since you like it!! Id pay for an unlimited email storage so i could have 365 days of snow! Yeah, i didnt really even look at the last pic a lot, but it really makes the Rabbit look tiny. I wish we got the cool Japanese and Euro cars here, all we get are giant sedans and trucks that all look the same now a days. My good friend stopped by after work today, and had brought a couple of his RC rigs over to invite me on a snow run, since we so rarely get to play in the snow. We went up to a great slickrock like park thats very covered by trees and sort of hidden. All the rocks had a light dust of snow and the water was all frozen. It was a really good run. Then he dropped me off at a park a few blocks from my place, and headed home for the night. I snapped a few more pics on my walk home, and tested a different set of tires i brought. My friends Scout. Mostly home built, leaf springs all around. 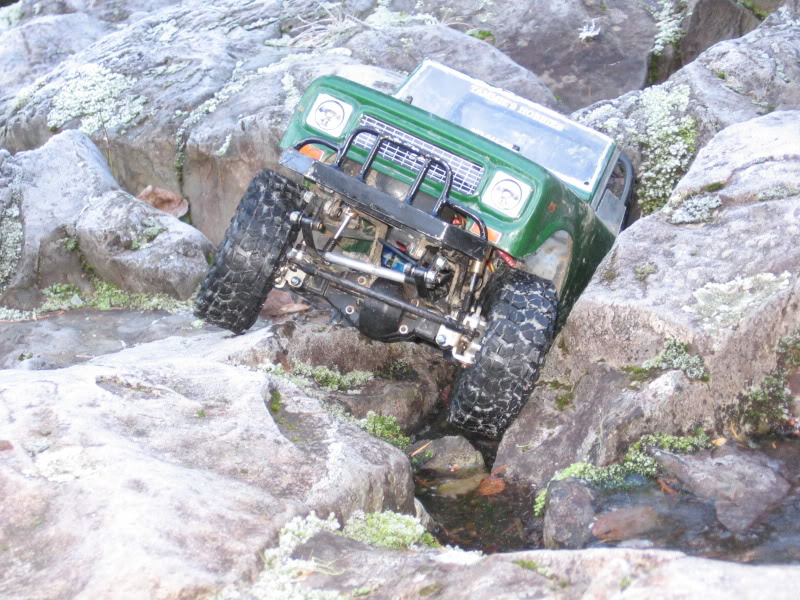 My (Beater) Toy. I have a few Toyota RCs with this body, this is the one i built up it all to just take serious abuse all day. Its amazing what it takes, over and over. Leaf springs all around, of course. Testing some custom tires. I cut 3/4in of rubber out of the middle of the tires, making them half as wide, i also removed 2in of the circumference to make them fit on a 1.9in wheel instead of the original 2.2in wheel. Worked awesome.   Ice is fun 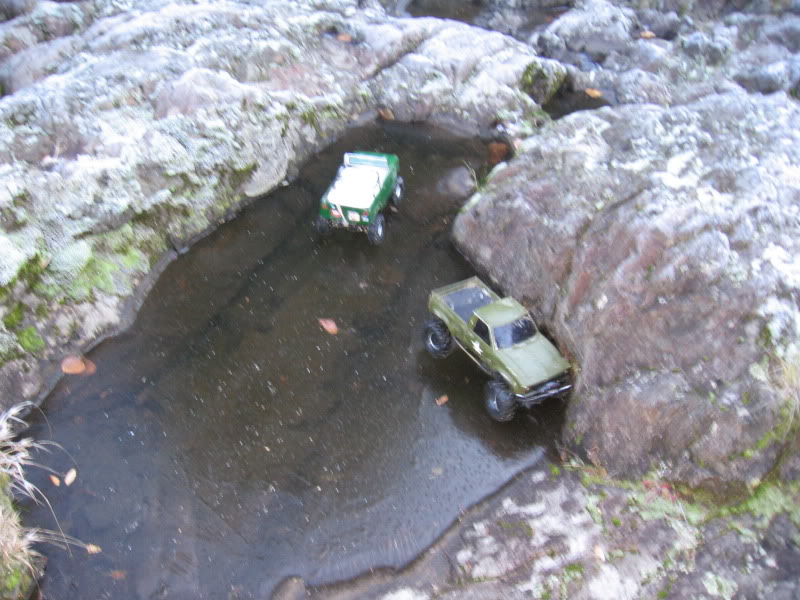 Hmm  Lol 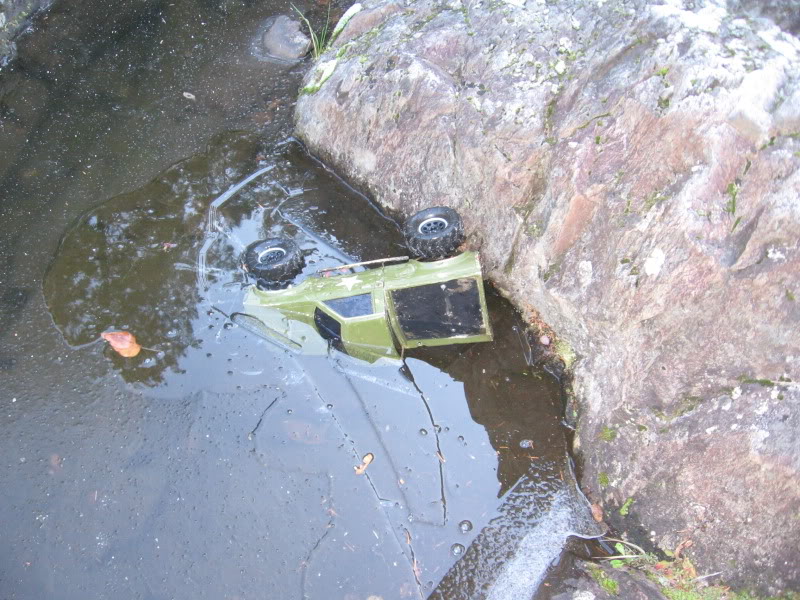 My friend also brought his Jeep TJ. 4 link and coils / oil dampers all around. Works really good, sometimes better than my Toy because of his approach angles. 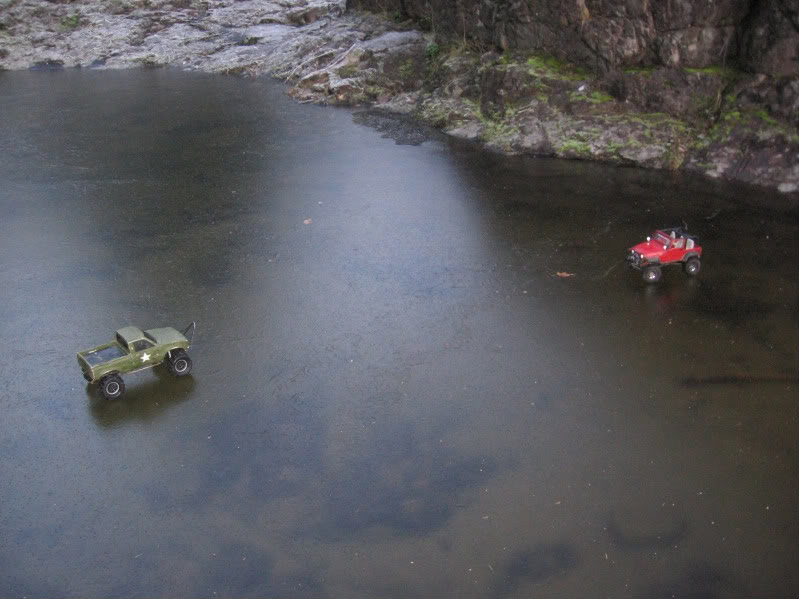 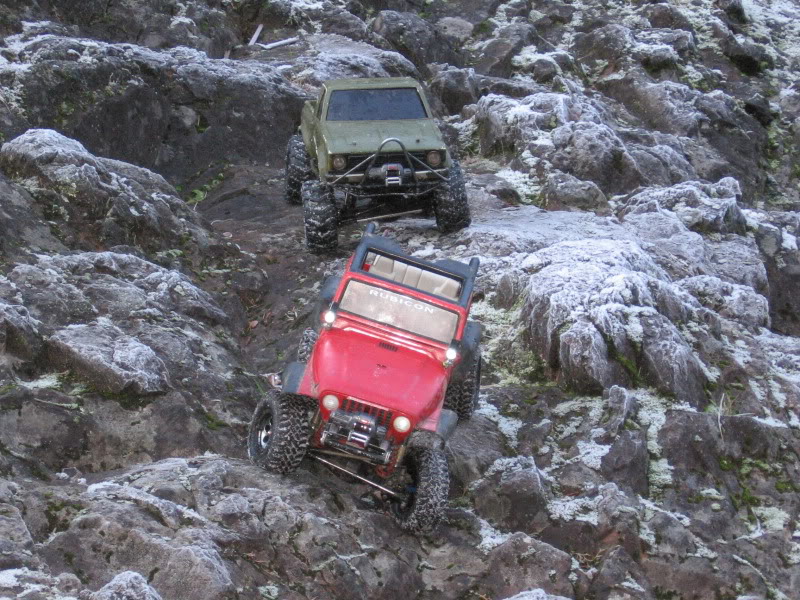 Got dropped off, starting to head home through the trails i can find / make. Put on some different tires. An Interco Bogger knockoff. Looks cool, works like real boggers, good forward traction, slippy and sketchy side to side, especially in the snow. I liked them though overall, they were a little taller, so it worked since this park is not covered and is higher up, so it got alot more snow. Same as my place, the park we went to, is about 1600ft lower and 2 miles away. 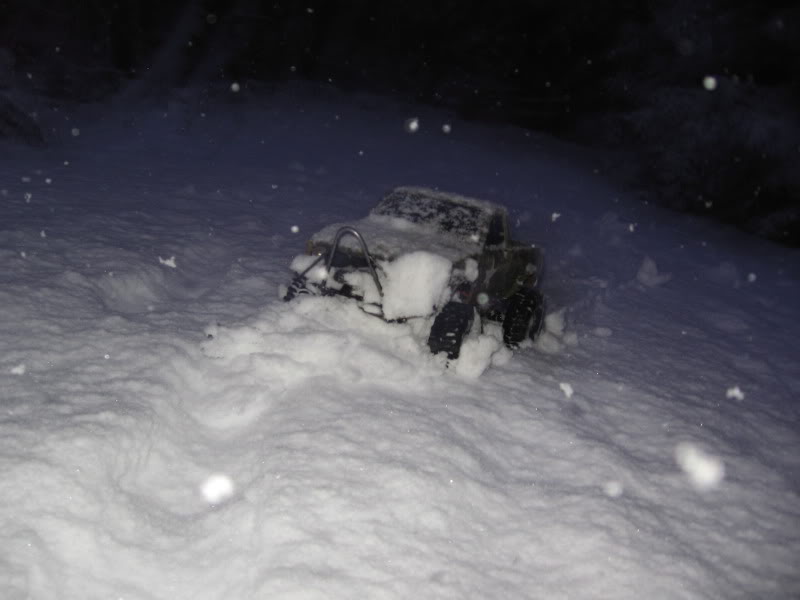 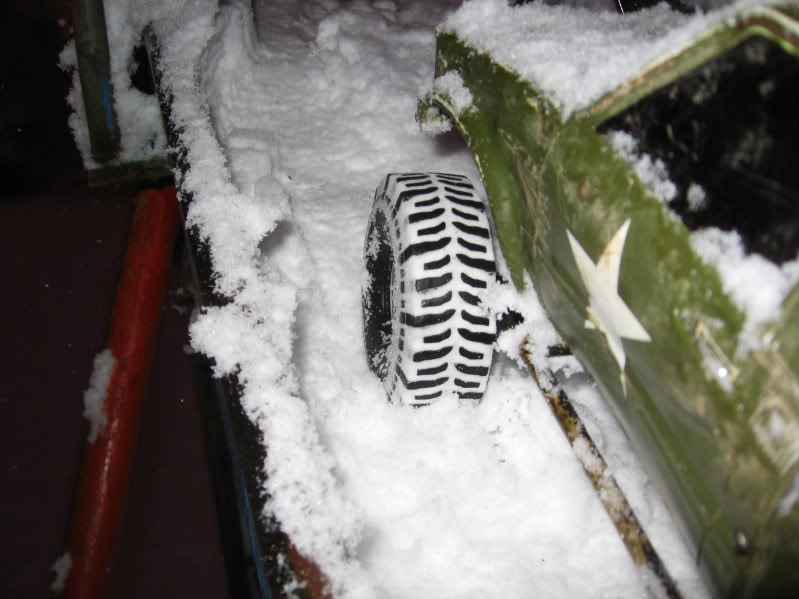 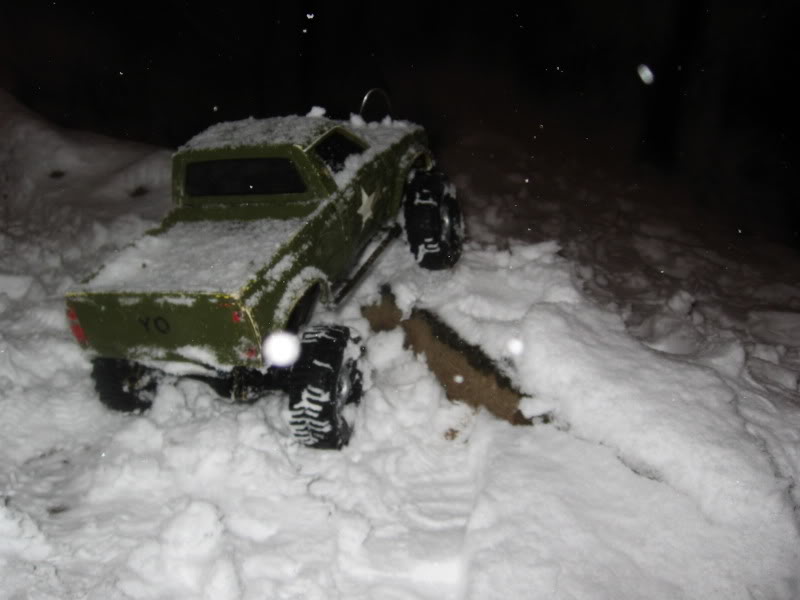 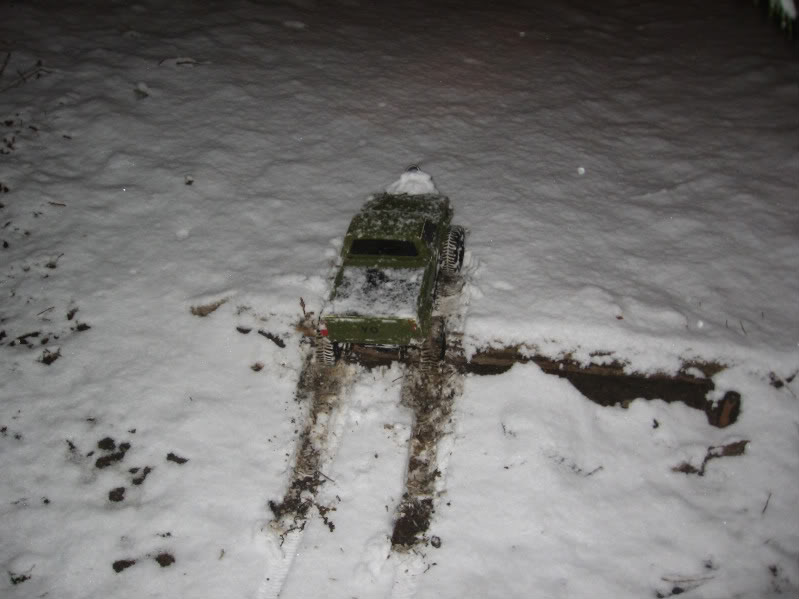  Almost home 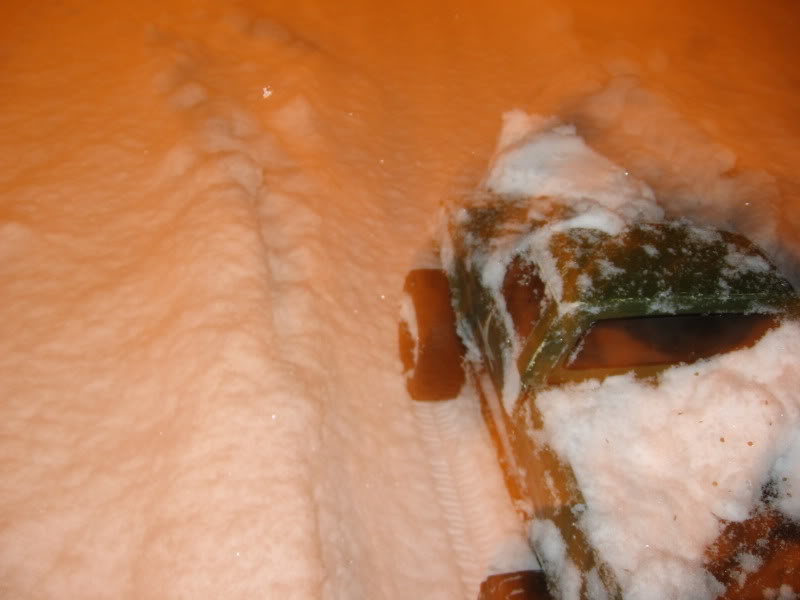 | |
|   | | redlinemotorsportts
Moderator


2014 Build-Off Entrant
2014 Build-Off Entrant
Age : 27
Join date : 2013-03-18
Points : 7483
Posts : 3131
Location : raleigh nc
 | |   | | Krawler86
Member


2023 Build-Off Entrant
2023 Build-Off Entrant
Join date : 2014-01-02
Points : 4154
Posts : 152
Location : PNW
 |  Subject: Re: Craftsman GT II My first AT Tractor Subject: Re: Craftsman GT II My first AT Tractor  February 7th 2014, 12:07 am February 7th 2014, 12:07 am | |
| - redlinemotorsportts wrote:
- Looks to be a few TF2's and a scx10?
Nope  Red TJ is an MFM chassis, fairly old school, with a Traxxas 2wd Elec trans and Tamiya TLT axles. Scout is an all homemade steel rail chassis built by me in 2007, then sold to him, he built the bumper and roll cage, plus added leafs front and rear (scout). I built it to use radius arms and coils in the front, leafs in the back with a 1970 F100 body, and it had a different front bumper. Scout is also on Tamiya TLT axles. My Toy is a home made aluminum rail chassis built whenever Axial first brought out their solid axle and Scorpion kit. I got one of the first in oregon, was working at a hobby shop at the time, and sold some customer all the stuff out of it but the axles and trans. I dont remember that date, but somewhere like o4 o5ish. Its been through many different looks. Heres when it was a mockup and my side plates were fresh off the drillpress. 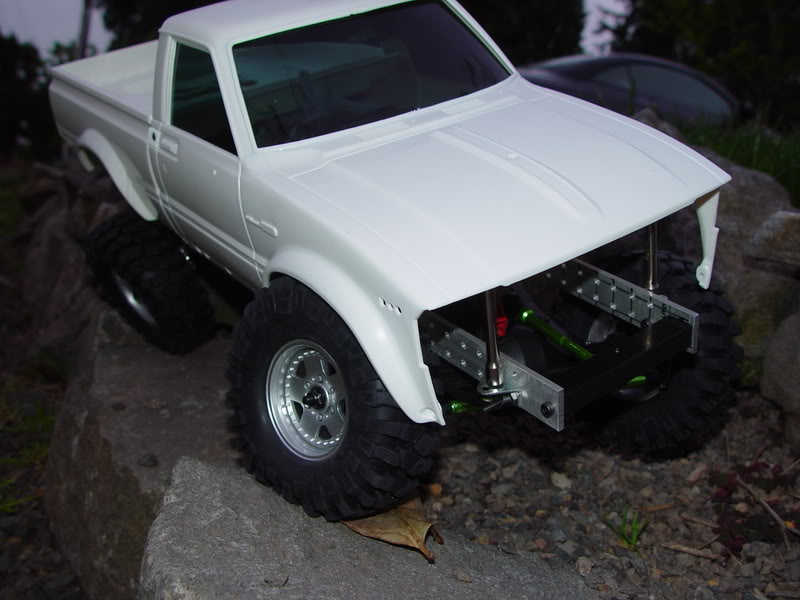 I remember RC4wd was really new, because all they made were crappy compound tires and poor quality TLT hopup parts. I do have 1 pretty modified SCX10 base i tried to make look as factory as possible from Axial even though it was not something they made. Drives pretty well, but i like my homemade stuff better. 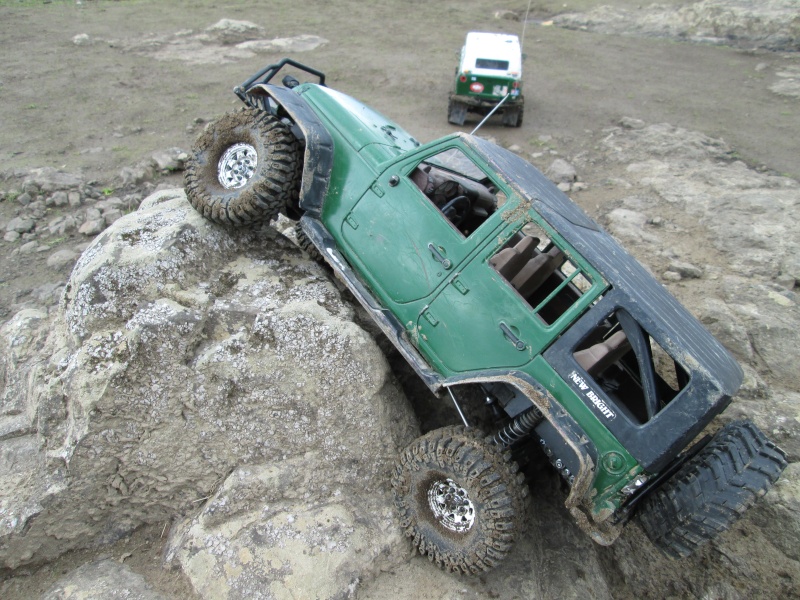 These are some of the most fun though  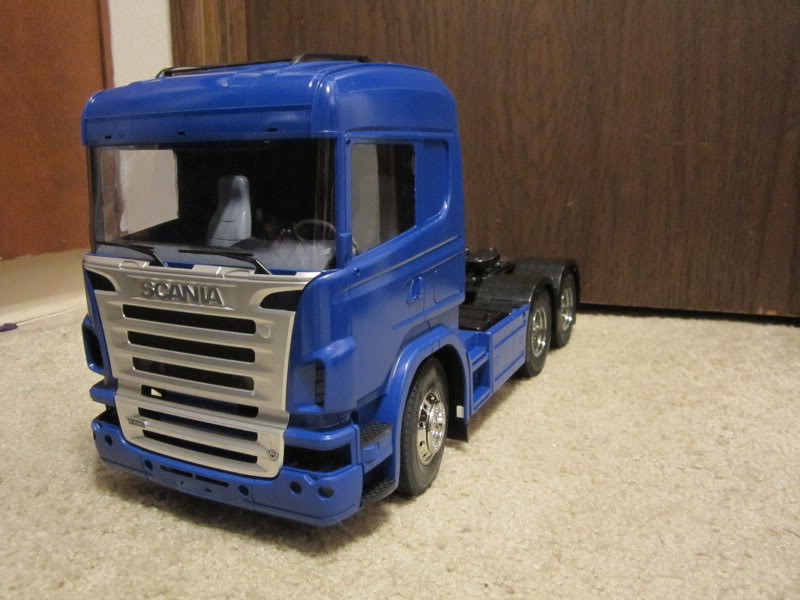 Im a total Tamyia nut, i have been collecting them and related parts for quite a while. I mainly collect them for their vastly unsurpassed detail and quality, but also chassis realism and variety. For instance, onroad i have FF, FR, MR, RR in 2wd, and Front and 2 different mid motor 4wd. Plus 2 and 3 axle 5th wheel Semi trucks and Box trucks, fun 3 speed transmissions that sometimes feature 2wd/4wd, and their high end stuff is just amazing engineering when you build one. | |
|   | | Moose
Established Member


Age : 35
Join date : 2014-01-12
Points : 4951
Posts : 919
Location : Defiance, Ohio
 | |   | | redlinemotorsportts
Moderator


2014 Build-Off Entrant
2014 Build-Off Entrant
Age : 27
Join date : 2013-03-18
Points : 7483
Posts : 3131
Location : raleigh nc
 |  Subject: Re: Craftsman GT II My first AT Tractor Subject: Re: Craftsman GT II My first AT Tractor  February 7th 2014, 5:59 pm February 7th 2014, 5:59 pm | |
| rc4wd builds some awesome stuff now a days, like accessory wise. not sure how there running gear does. they got into construction equipment and semi trucks now that will run you $3K+
So about the tractor, what all you waiting on? | |
|   | | Krawler86
Member


2023 Build-Off Entrant
2023 Build-Off Entrant
Join date : 2014-01-02
Points : 4154
Posts : 152
Location : PNW
 |  Subject: Re: Craftsman GT II My first AT Tractor Subject: Re: Craftsman GT II My first AT Tractor  February 7th 2014, 10:46 pm February 7th 2014, 10:46 pm | |
| - redlinemotorsportts wrote:
- rc4wd builds some awesome stuff now a days
So about the tractor, what all you waiting on? They do. All that construction stuff has been on Gardentrucking.com for a long time, RC4wd just started carrying some of the stuff out there. Id love to get some of that stuff, but it was the one aspect of the hobby i couldnt get a discount on since we didnt carry that stuff. But the full hydro equip is awesome. Im waiting on hardware right now. I went to the store today, they had gr8.8 5mm bolts in the right length for the long shoulder, but not in the shorter shoulder. I picked up the hardware i needed to complete one side, and mock up the other. Going to see about drilling up one side and seeing how it goes in a little bit, after i eat. Im really waiting on building the transaxle, because im ready to mount the engine and clutch, so i need the rear pulley on. Im doing maths right now though. I have the hardware to do it with 3 bolts per gear with large hardware, so im debating scrapping the many small in a week or so, to few large tonight, then i could have the rearend ready to go in tonight. I hope the maths workout with similar safety factor with the 3 large vs the 18 small. But we will see. | |
|   | | Krawler86
Member


2023 Build-Off Entrant
2023 Build-Off Entrant
Join date : 2014-01-02
Points : 4154
Posts : 152
Location : PNW
 |  Subject: Re: Craftsman GT II My first AT Tractor Subject: Re: Craftsman GT II My first AT Tractor  March 27th 2014, 11:55 pm March 27th 2014, 11:55 pm | |
| Man its been way too long since i got to really work on the tractor. I finally got over the locker and got something to build thats not going to break. Im expecting shaft failures with 0 chance of damage to the locker or gears. There is no way for weld material to break loose, theres no broken planetary gears to worry about (because i deleted the platentaries) and really simplified the diff. Af far as im aware, the method i used will only be of use to someone with a 6 planet 3 speed transaxles from a GT18 or similar, or a slightly different drill pattern would also allow this method to be easily used in the older 4 planet 3 speeds from the Suburbans and whatnot. I started with some 1/2in cold rolled steel rings cut out by waterjet at my friends work, 2 7/16id fit the od of the major diameter of the side gears really well. Then another friend, a more experienced welder, tig'd all the teeth to the ring then flipped the whole thing and fllled it all in from the back with a mig. I dont think theres any way these things are going to break. Far better than my bolt on, or welded planet lockers. 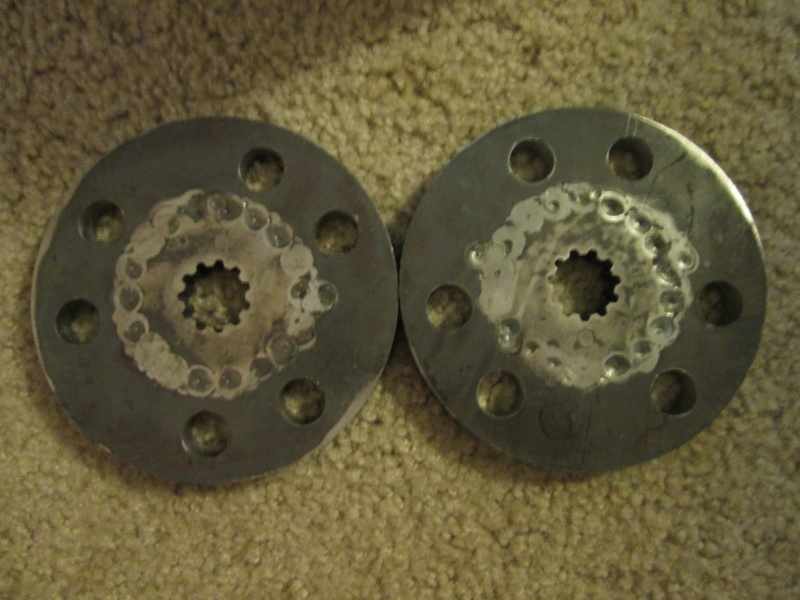 Heres the rings after i finished drilling the 12 5/8in holes. My drill press is a little beast, but was running into stalling issues with the 5/8. The 3/8 pilots went like butter, but 3/8 is the largest i can drill at a relatively good rpm for the size. My press in low is about 850 rpm. I ran into some stalling of the chuck so i tightened up the belt and then was starting to stall the motor. As slow as i can go feels about 60% too fast for a 5/8. It gets chattery and the tool pressure needed for a decent hole at that rpm stalls the motor. So i got a little creative and strapped a 2nd GE 1725rpm induction motor 1/4hp onto the side of my press, and rigged up a twisted belt to drive the main motor pulley at 1:1 but reverse direction. My other motor spins the opposite direction. Since i couldnt gear down, i powered up! This gave my press twice the power, and that little aramid belt held up great. When i stalled the chuck the main belt would slip, but the little aux power belt never complained, i was really waiting for it to fail the whole time. But its still good enough to put back in the 4x4 RC it came out of. Rigged up... lol. i cant believe this worked. Powered through the 5/8 pretty darn well. Still too fast, but i got the job done. 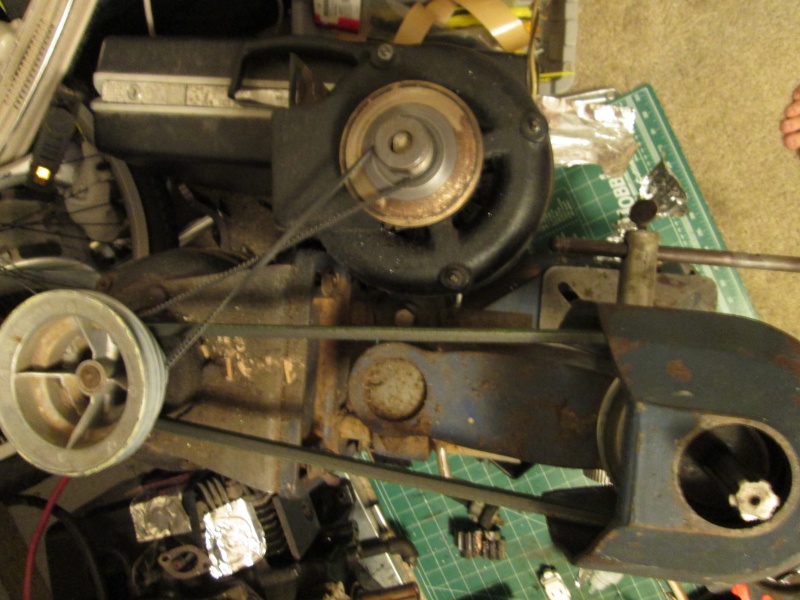 After i got it all drilled up. I set some things up and mocked some other things up, and it looks good. The rings that drive the axles are driven directly by the planet gear bushings which are now effectively shear pins. I really like this design and am glad i didnt jump into anything before i thought it through. The rings get stuck between the diff housing half and the bull gear. They will be held to the outsides by the C clips in the axle shafts.  Since its about time to FINALLY start building the transaxle back into a unit, i decided to give it a shower and massage. Now i can pick it up and set it in my livingroom without making any kind of mess. Man, working on clean stuff is glorious. Time to build up the diff and start putting all the gears and shafts back into the housing. I cleaned out every needle bearing, and oiled them up. They are all in great condition except for a little grit i cant get out in 1. But they are all way better than before so im hoping it will be fine. 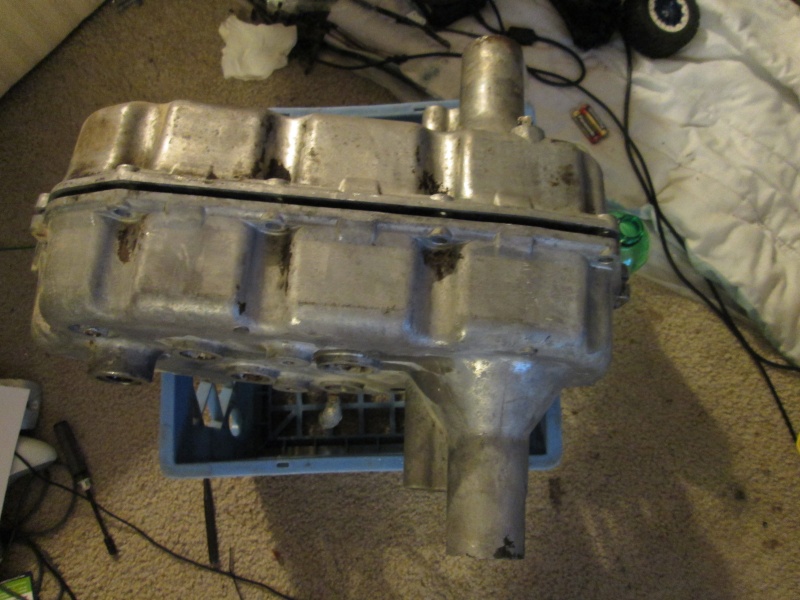 Time to trace out and make a gasket for the halves, then assembly time, woohoo. | |
|   | | Krawler86
Member


2023 Build-Off Entrant
2023 Build-Off Entrant
Join date : 2014-01-02
Points : 4154
Posts : 152
Location : PNW
 |  Subject: Re: Craftsman GT II My first AT Tractor Subject: Re: Craftsman GT II My first AT Tractor  March 28th 2014, 4:20 am March 28th 2014, 4:20 am | |
| Made a new case gasket from a big sheet. Roughed it with scissors and a util. knife. Came out pretty good. Still need to do a new shifter gasket, but im not going to worry about that until later. Rough, after punching. 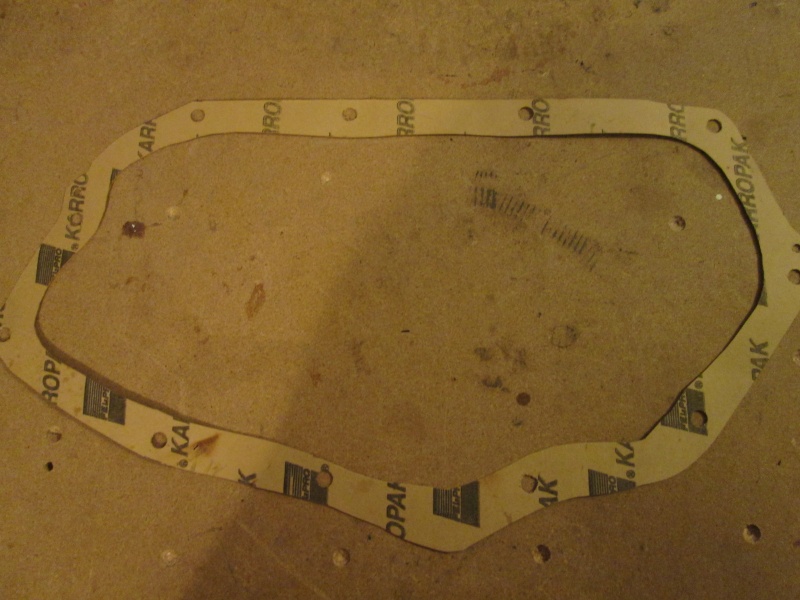 I cleaned up the mating surfaces well and took off a couple small high spots. Gave the gears, shifters and range sliders a quick wipe down to get the dust from sitting for so long off em, and also gave em a little mist of some light oil. Heres everything, all nice and fresh, all ready to go back together. Cant wait to finally mount the rear wheels on the tractor. 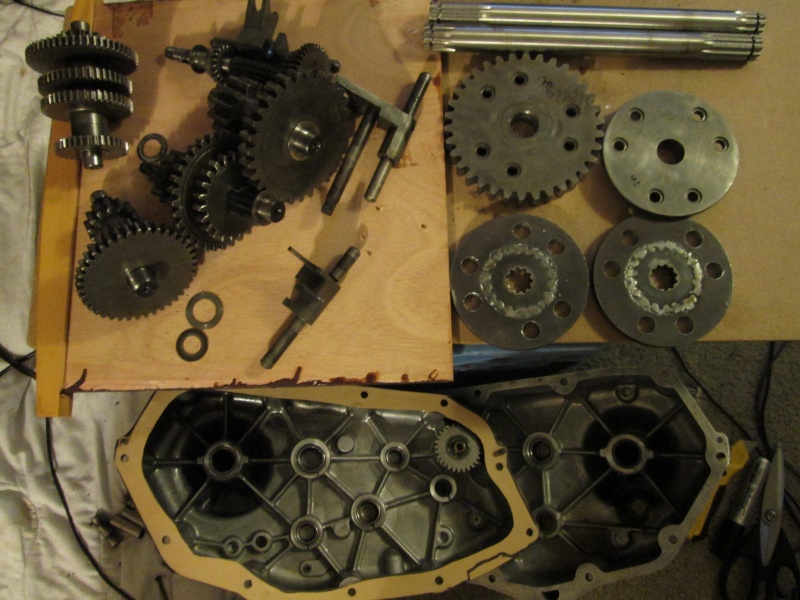 | |
|   | | redlinemotorsportts
Moderator


2014 Build-Off Entrant
2014 Build-Off Entrant
Age : 27
Join date : 2013-03-18
Points : 7483
Posts : 3131
Location : raleigh nc
 | |   | | Krawler86
Member


2023 Build-Off Entrant
2023 Build-Off Entrant
Join date : 2014-01-02
Points : 4154
Posts : 152
Location : PNW
 |  Subject: Re: Craftsman GT II My first AT Tractor Subject: Re: Craftsman GT II My first AT Tractor  March 28th 2014, 7:12 am March 28th 2014, 7:12 am | |
| Its hard to completely forget when you share your livingroom with a GT...  Made enough progress for tonight. Time for some sleep. I found out 2 of my 6 planet bushings are cracked and worn weird which causes the diff halves to want to sit slightly out of parallel. I found 3 that are in good condition and hadn't spun, and decided to just use the 3. I think it will be strong enough, especially with my clearances i left. They all sit tight, and the locker literally has no slop from side to side. Not even a wobble. Theres not going to be any impact stressers or anything in the diff. Besides, if 2 can drive each wheel on a suburban, 3 shared should be fine, then if it ever develops slop, i can rotate to the other set of 3 holes to use. Of course if these 3 crack or anything, il be ordering 6 new ones and rebuilding with those. Im 95% sure it will still snap shafts before anything else lets go. It at least looks like somethin. Tomorrow will be lubing up for assembly and hopefully have it mounted in by the evening. 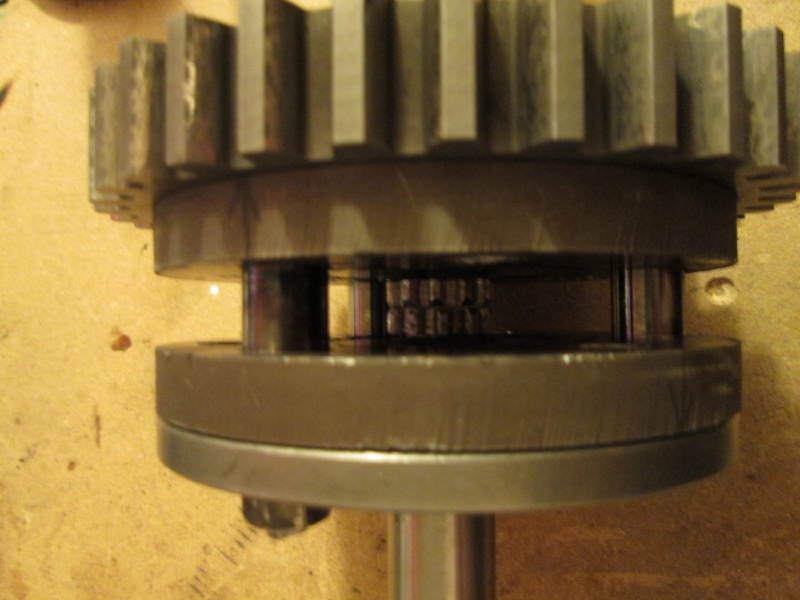 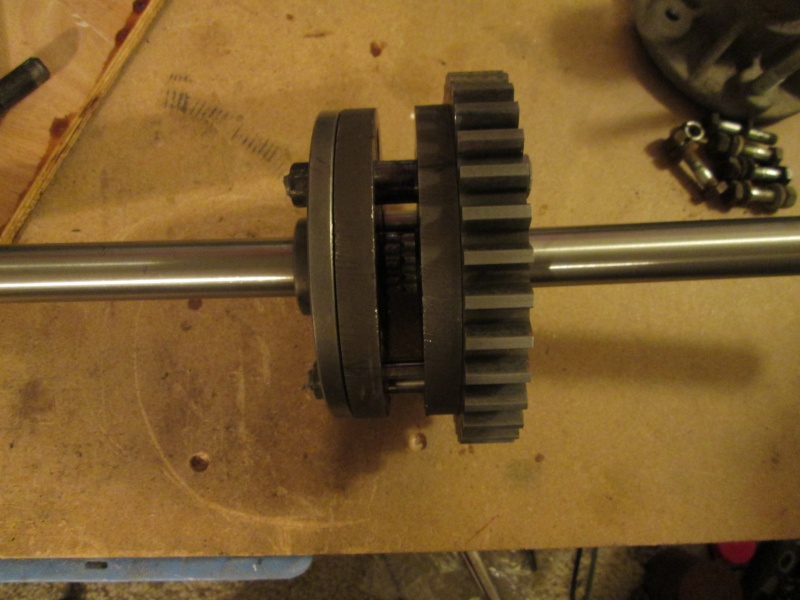 | |
|   | | Doc Sprocket
Site VIP

2018 Build-Off Entrant
2018 Build-Off Entrant
2021 Winner of Winners
2021 Winner of Winners
1st Place Build-Off 2016
1st Place Build-Off Winner 2016
Age : 51
Join date : 2013-04-21
Points : 7318
Posts : 2914
Location : Ontario Canada
 |  Subject: Re: Craftsman GT II My first AT Tractor Subject: Re: Craftsman GT II My first AT Tractor  March 28th 2014, 7:40 am March 28th 2014, 7:40 am | |
| I'm just catching up with this build now. Looking quite good, and interesting to see no-weld solutions to commonly welded issues. Normally, I wouldn't think twice about fabbing up a new front axle, with melting metal being the natural answer. The bolt-on stuff is neat.
A prior comment suggested that you're over-thinking things. I find it refreshing. Nice to see a guy whip out the slide rule, rather than just smack everything together and hope for the best. It'll pay off in the end.
Shame about your truck. I share the 'yota fetish, and have for a looong time. At different points in the past, I have owned a '77 Celica ST fastback, a '76 Celica GT fastback, an '84 XtraCab 4x4 pickup, and an '88 'runner. I miss them all... | |
|   | | redlinemotorsportts
Moderator


2014 Build-Off Entrant
2014 Build-Off Entrant
Age : 27
Join date : 2013-03-18
Points : 7483
Posts : 3131
Location : raleigh nc
 | |   | | Creepycrawler
Established Member


2024 Build-Off Entrant
2024 Build-Off Entrant
Age : 37
Join date : 2013-07-02
Points : 5019
Posts : 731
Location : Logan Ohio
 | |   | | Krawler86
Member


2023 Build-Off Entrant
2023 Build-Off Entrant
Join date : 2014-01-02
Points : 4154
Posts : 152
Location : PNW
 |  Subject: Re: Craftsman GT II My first AT Tractor Subject: Re: Craftsman GT II My first AT Tractor  March 28th 2014, 5:10 pm March 28th 2014, 5:10 pm | |
| - Creepycrawler wrote:
 Nicely Done! that is a beautifully beef setup! Nicely Done! that is a beautifully beef setup! Thanks, im an absolute sucker for drivetrain overkill. Id much rather pop a shaft and lose a wheel, strap the wheel on the tractor and limp back to camp on 3 wheels then explode the case or some other imobilizing failure. Getting readt to do some final shifter clearancing on the gasket and stick the halves together. Next will be a shifter gasket and possibly mounting the whole unit under the frame.. Cool. 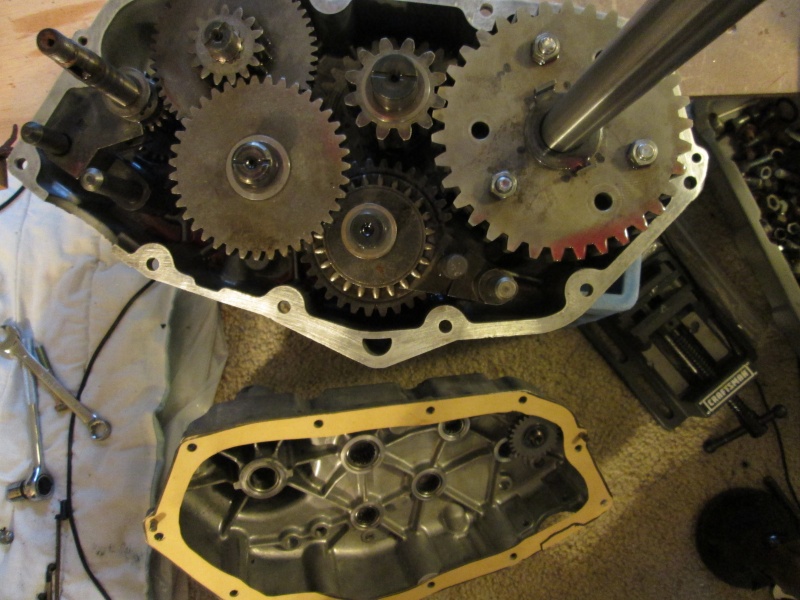 | |
|   | | Krawler86
Member


2023 Build-Off Entrant
2023 Build-Off Entrant
Join date : 2014-01-02
Points : 4154
Posts : 152
Location : PNW
 |  Subject: Re: Craftsman GT II My first AT Tractor Subject: Re: Craftsman GT II My first AT Tractor  March 29th 2014, 5:24 am March 29th 2014, 5:24 am | |
| Woohoo, major milestone completed. The transaxle is completed and final assembled. I still need to get a new band brake shoe and clean up the drum and input pully, but as far as the actual unit its ready to rock. It went together very well, except for the gasket i made. It turns out it was too thin, so i had to make a 2nd gasket to get the correct distance between the halves. With just the one on there, right at the point the halves snugged, the shafts started binding. The 2nd gasket was a copy of the first, then i used some shellac to laminate the 2 together to make a single thicker gasket. Works perfect. I also cut a small ring for the shifter, and remounted the shifter. It shifts through all the gears and the range selector seems to be working. All it needs now is oil. Il probably wait to fill it after i bring it out of my appartment for final assembly of the traptor. In case it leaks a little, i dont want it to leak inside. The oiling i gave everything during assembly should be plenty until it gets filled. After trimming the outside flush you cant even tell its not a factory gasket. 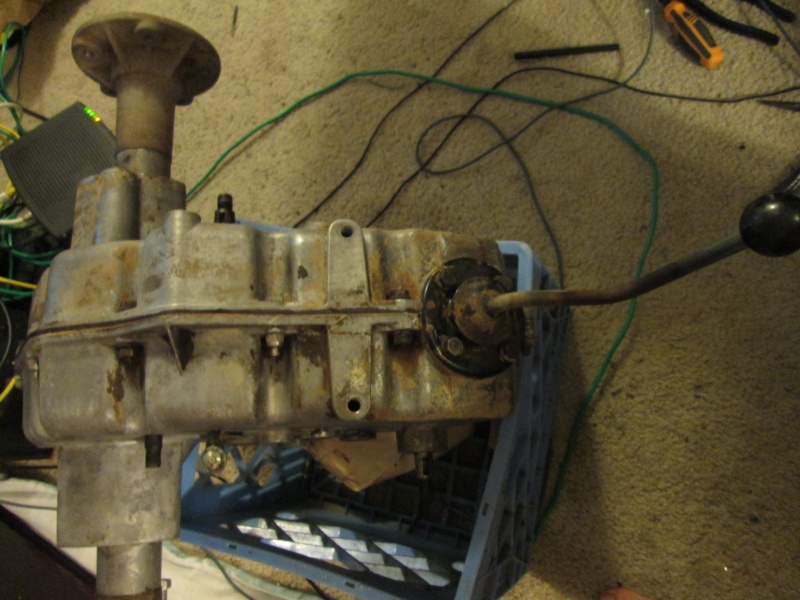 I wanted to get it mounted up on the frame tonight, but my good friend stopped by after work and we got caught up doing some video game wheelin in Rigs of Rods for a while, which hampered my work time. It was good fun and worth the time spent though. I like having this hulk of a 3 speed sitting in front of me, its fun to look at. | |
|   | | Krawler86
Member


2023 Build-Off Entrant
2023 Build-Off Entrant
Join date : 2014-01-02
Points : 4154
Posts : 152
Location : PNW
 |  Subject: Re: Craftsman GT II My first AT Tractor Subject: Re: Craftsman GT II My first AT Tractor  March 29th 2014, 8:57 pm March 29th 2014, 8:57 pm | |
| Oh man, i got the transaxle mounted up in the frame and stuck the rear wheels on. None of the tires have any air in them, so they actually clear the rear fenders. Kind of nice, so i can leave them on while i trim them out. I dont want to get a hand or fingers between the treadblocks and sheetmetal. I think i also need to figure out a flare. The tires stick a few inches outside the fender, and will probably just cover me with crap. Man these tires and new stance give this rig a serious boost of burliness. Its a nice thing to wake up and see sitting in the livingroom. Makes me smile. 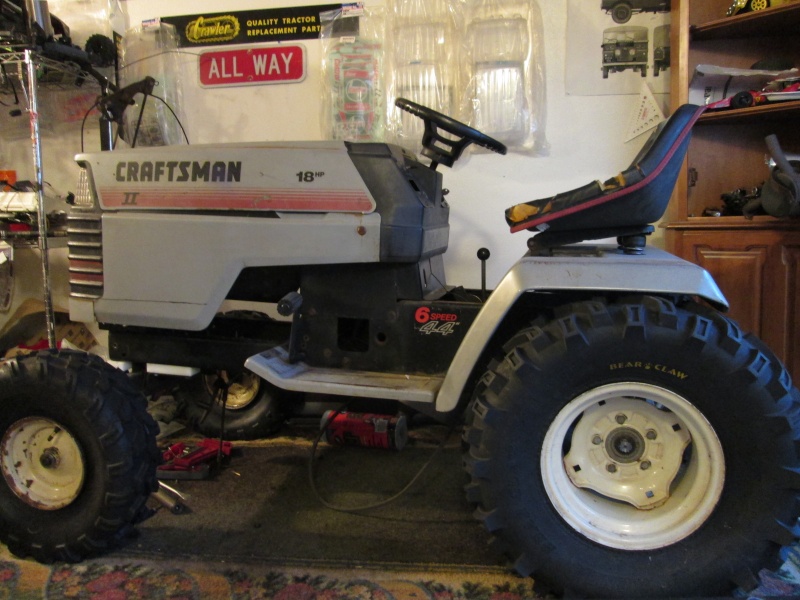 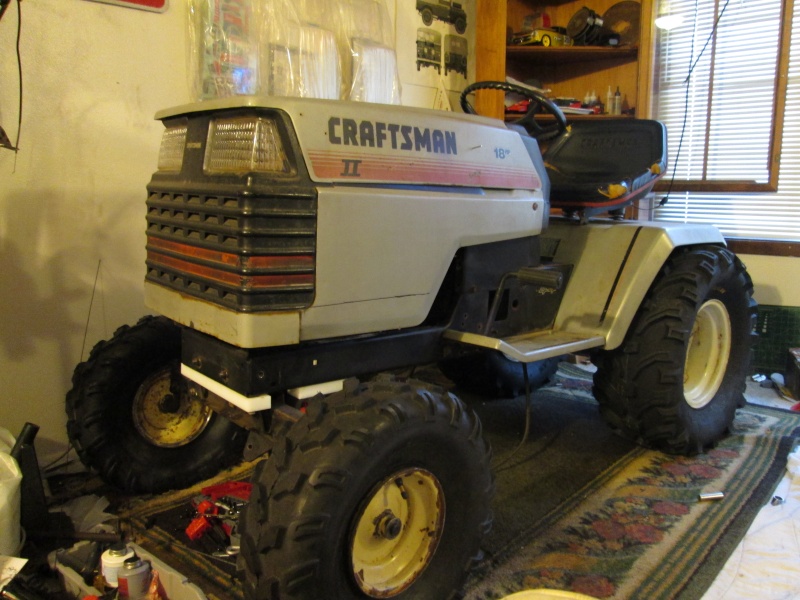 | |
|   | | Sponsored content
 | |   | | | | Craftsman GT II My first AT Tractor |  |
|
Similar topics |  |
|
| | Permissions in this forum: | You cannot reply to topics in this forum
| |
| |
| | Who is online? | In total there are 17 users online :: 0 Registered, 0 Hidden and 17 Guests
None
Most users ever online was 412 on January 7th 2023, 7:59 am
|
|


