| | Craftsman build. |  |
|
+14Angchor Craftsman1998 camomanusa willis923 k2500life MowBandit richie thomas greener179 TheRainbowBoxer Doc Sprocket redlinemotorsportts Doug LAWN MOWER MUDDER TheBeal 18 posters |
|
| Author | Message |
|---|
TheBeal
Veteran Member

Join date : 2013-06-06
Posts : 1402
 |  Subject: Re: Craftsman build. Subject: Re: Craftsman build.  April 7th 2014, 8:18 pm April 7th 2014, 8:18 pm | |
| I do... but its not working for me. lol But anywho... some pics. Thats how the exhaust will be routed. I will need to extend them so they go below the footboards or whatever they are called. 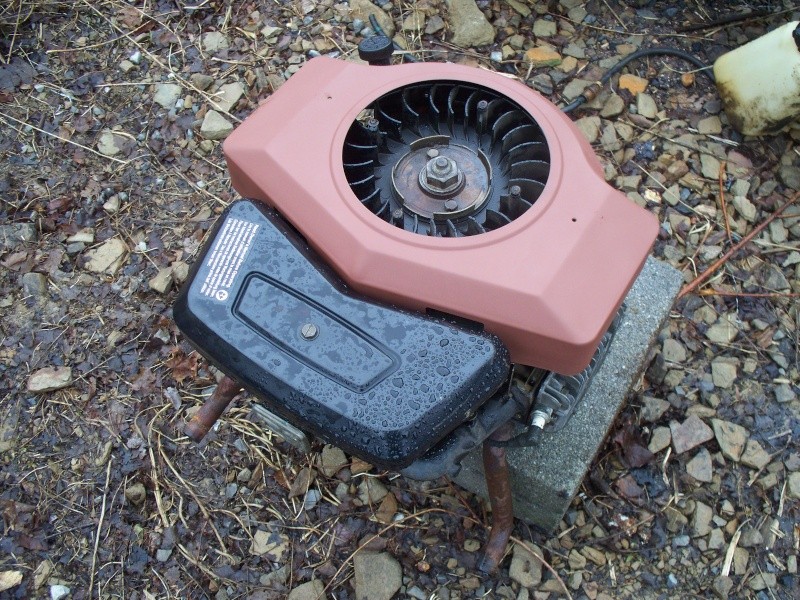 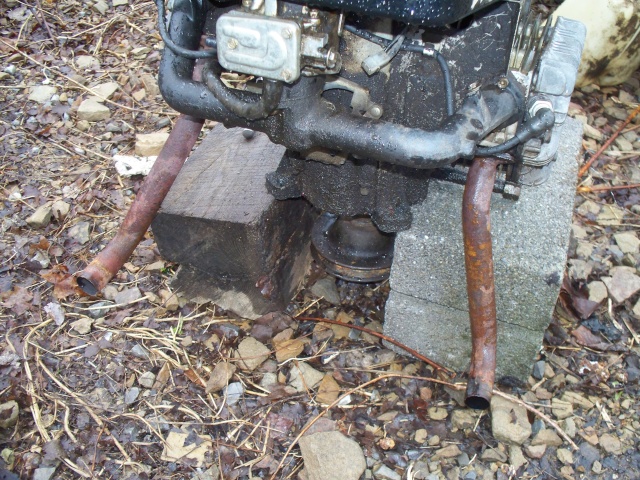 | |
|
  | |
TheBeal
Veteran Member


Age : 30
Join date : 2013-06-06
Points : 5718
Posts : 1402
Location : Central PA
 | |
  | |
redlinemotorsportts
Moderator


2014 Build-Off Entrant
2014 Build-Off Entrant
Age : 27
Join date : 2013-03-18
Points : 7484
Posts : 3131
Location : raleigh nc
 |  Subject: Re: Craftsman build. Subject: Re: Craftsman build.  April 11th 2014, 8:35 pm April 11th 2014, 8:35 pm | |
| I like the idea of mounting it backwards, and could you tell me what purple (like company you used) because thats a awesome color. | |
|
  | |
TheBeal
Veteran Member


Age : 30
Join date : 2013-06-06
Points : 5718
Posts : 1402
Location : Central PA
 |  Subject: Re: Craftsman build. Subject: Re: Craftsman build.  April 11th 2014, 9:10 pm April 11th 2014, 9:10 pm | |
| I figure it would be a bit easier to run the exhaust back, and not have a U in there anywhere. The paint, my dad brought home. I just slapped some one there to see what It looked like lol. Valspar Satin Purple. Lable on the can says something about being "product of the year" in 2012.. could be a couple years old... been frozen several times Im sure. And some more pics... 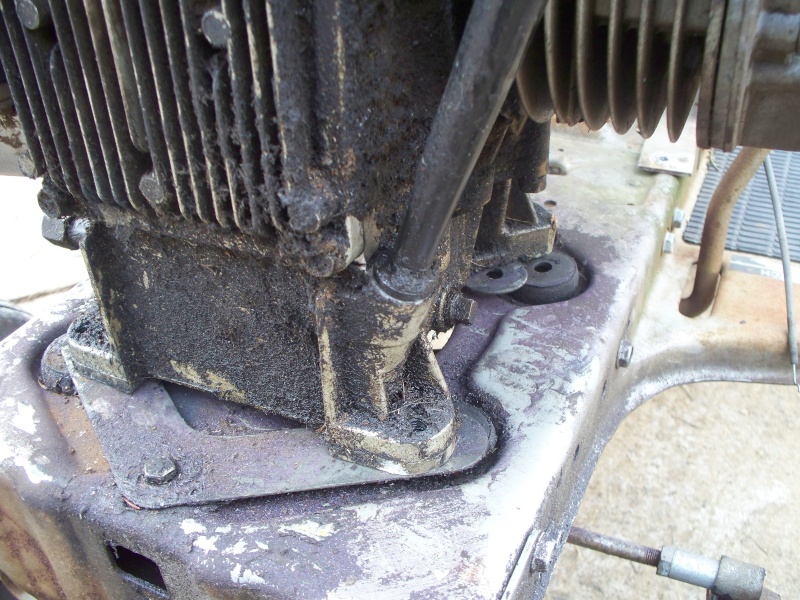 You can see the bolt holes do not line up... ugg. Solution? Cut out and replace with some 3/8 plate! (cause that what I have lol) 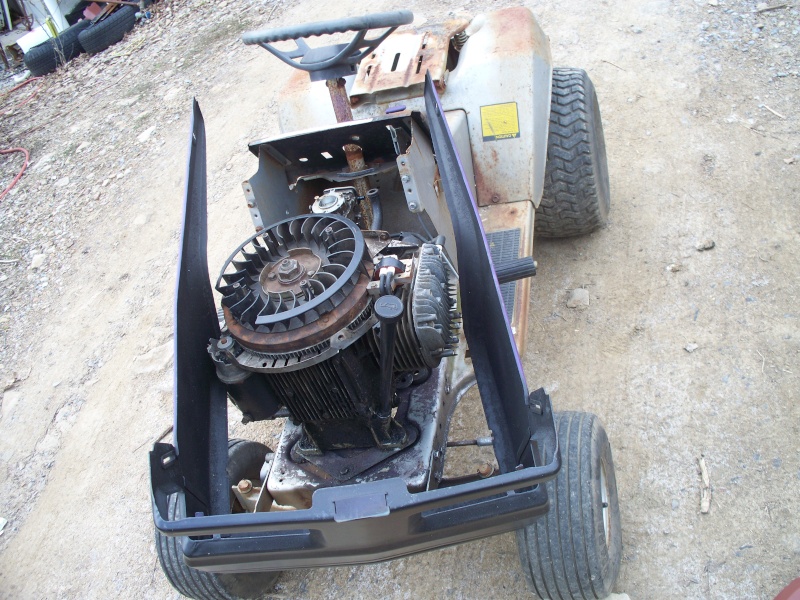 ...and here, you can see we have some fitment issues. Clearly I will have to break out the angle grinder... And hopefully, I can cut out the exact same on each side. Gotta be perfect!  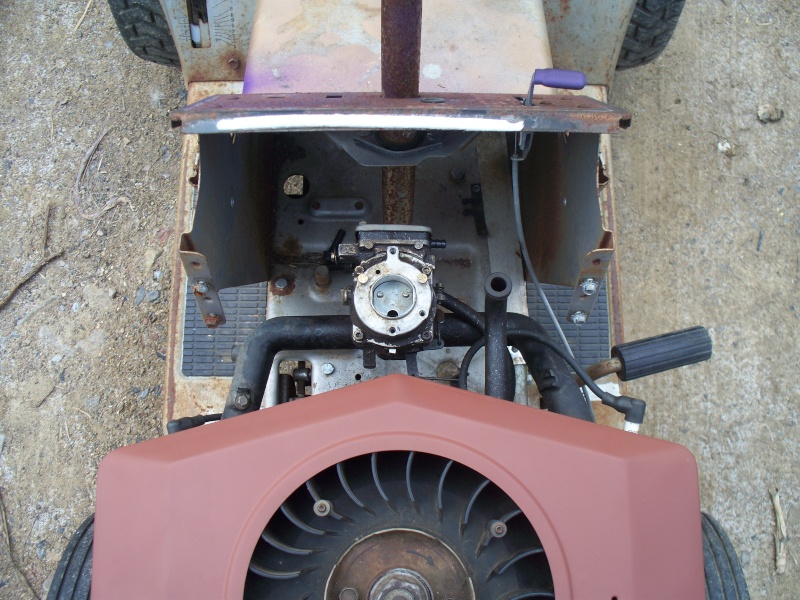 ...and here you can see about how far back the engine will be sitting, it will be further yet 2-3in. The stock air filter will not fit there. Also, the vents on the top of the hood are thereabouts... Im thinking hood scoop. 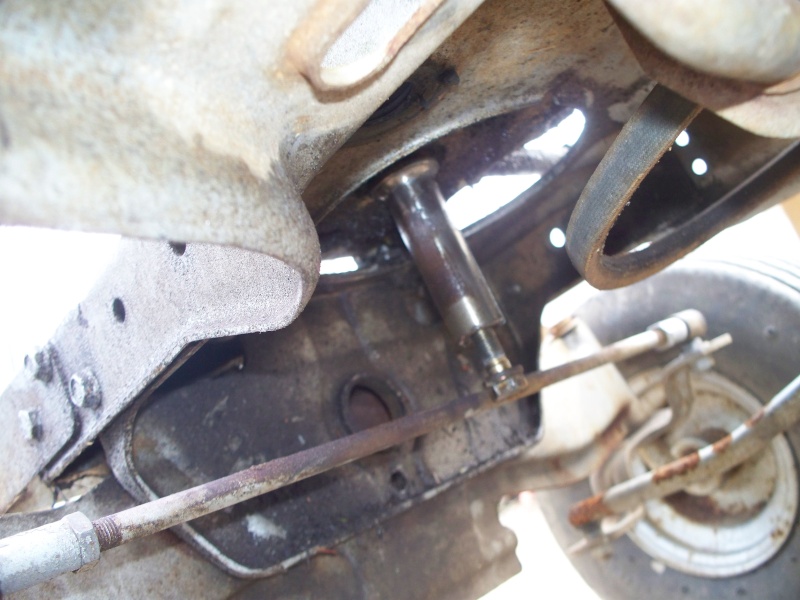 ...and here... as you can see, it was pretty darn close to that steering rod. Couldnt even set the engine on the frame with the stock pulley on there. 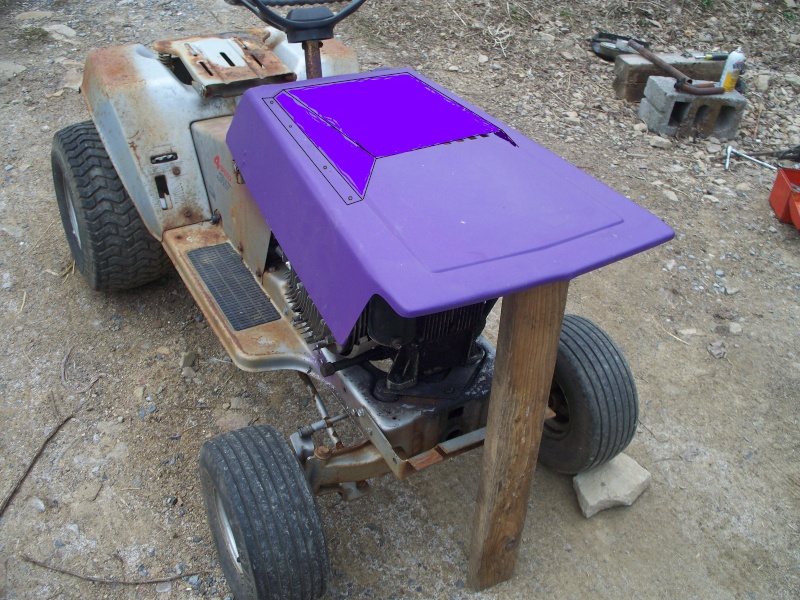 Hoodscoop anyone? | |
|
  | |
TheBeal
Veteran Member


Age : 30
Join date : 2013-06-06
Points : 5718
Posts : 1402
Location : Central PA
 |  Subject: Re: Craftsman build. Subject: Re: Craftsman build.  April 13th 2014, 8:56 pm April 13th 2014, 8:56 pm | |
| Cut this area out. Still need to cut a bit more, but this will be replaced with something around 1/4. Then i can position the engine further back aswell.  Thinking Im gona refigure the exhaust.. Gona make some new flanges and have about 6-8in if strait pipe then hopefully find some flexible tubing and run some of that, then exit out the sides in front of the rear tires with some 1 1/2 or so conduit... Any suggestions for modding the steering any? And my transaxles... a 3 and 4 speed. Both have a 900 020 tag. 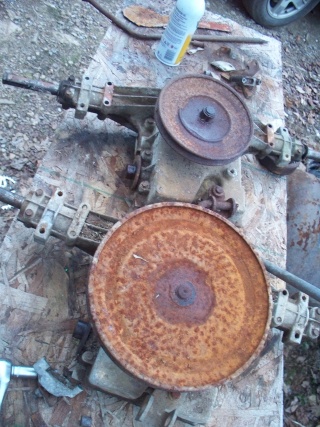 | |
|
  | |
redlinemotorsportts
Moderator


2014 Build-Off Entrant
2014 Build-Off Entrant
Age : 27
Join date : 2013-03-18
Points : 7484
Posts : 3131
Location : raleigh nc
 |  Subject: Re: Craftsman build. Subject: Re: Craftsman build.  April 13th 2014, 9:28 pm April 13th 2014, 9:28 pm | |
| Looks good, and what about steering? Like was it missing before this? Need something to go around the engine? | |
|
  | |
TheBeal
Veteran Member


Age : 30
Join date : 2013-06-06
Points : 5718
Posts : 1402
Location : Central PA
 |  Subject: Re: Craftsman build. Subject: Re: Craftsman build.  April 15th 2014, 8:46 pm April 15th 2014, 8:46 pm | |
| Heres the bracket that holds part of the hood in place, the bumper will mount to it. I was going to extend it a bit more, more to mount it to the frame/body... but it will be fine for now. 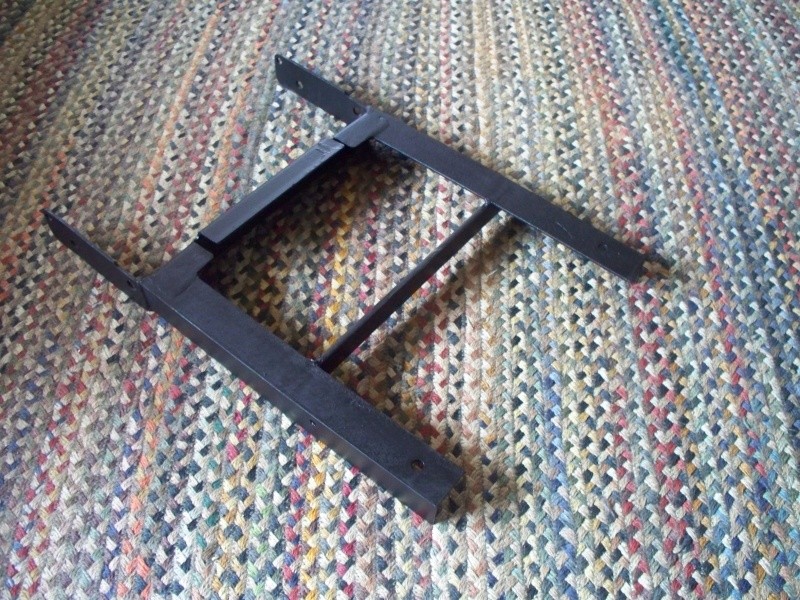 As it sits... 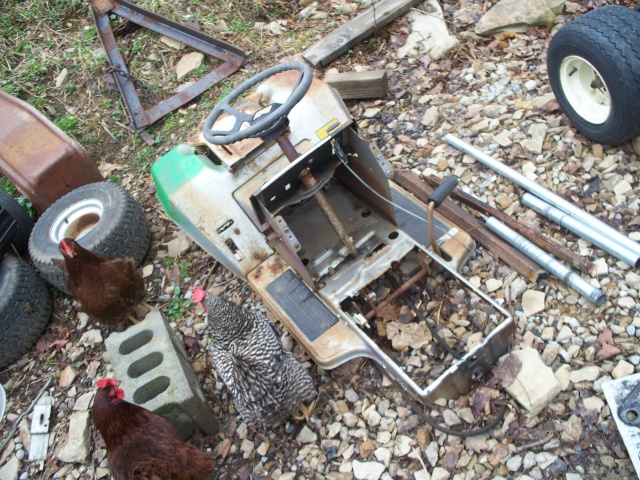 | |
|
  | |
TheBeal
Veteran Member


Age : 30
Join date : 2013-06-06
Points : 5718
Posts : 1402
Location : Central PA
 |  Subject: Re: Craftsman build. Subject: Re: Craftsman build.  April 17th 2014, 5:42 pm April 17th 2014, 5:42 pm | |
| Torched off the old trans pulleys... Might be able to save that hub. What do you people think about the possibility of getting these things drilled and tapped so as not to have to rely on them snap rings?  And the bumper... still need to drill some holes for mounting it. The RR spikes might come off. I wont go into detail on the welds... Im not exactly too proud of some of them lol 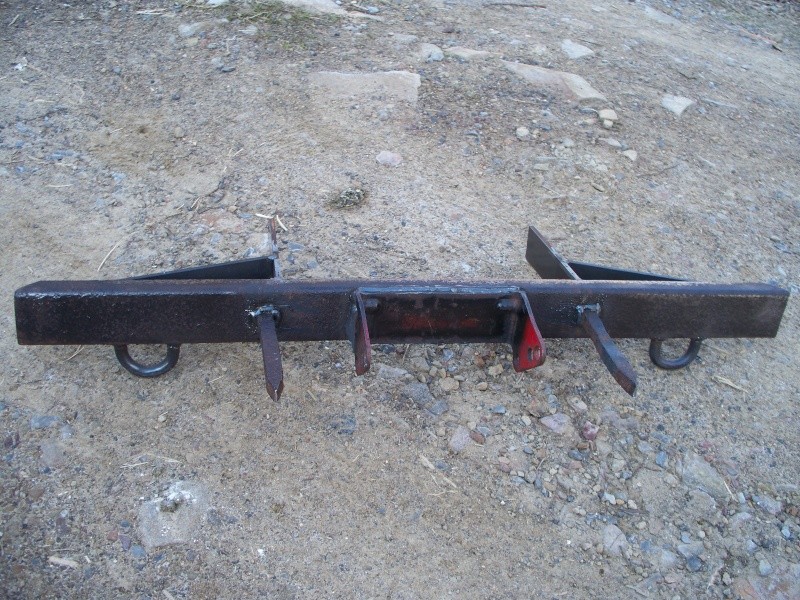 {EDIT} forgot this one... 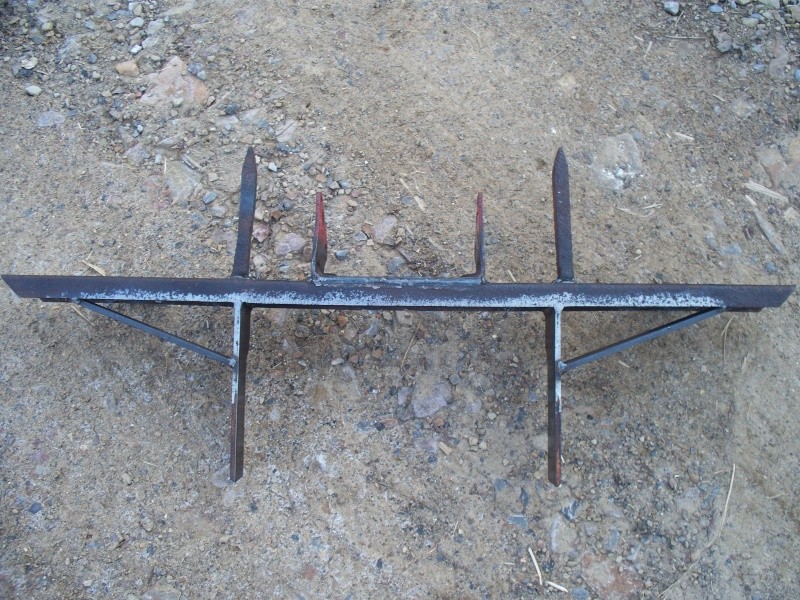 Any suggestions?
Last edited by TheBeal on April 17th 2014, 9:03 pm; edited 1 time in total | |
|
  | |
Angchor
Member


Age : 67
Join date : 2014-04-14
Points : 4420
Posts : 491
Location : Index, Washington
 |  Subject: Re: Craftsman build. Subject: Re: Craftsman build.  April 17th 2014, 6:36 pm April 17th 2014, 6:36 pm | |
| - TheBeal wrote:
- What do you people think about the possibility of getting these things drilled and tapped so as not to have to rely on them snap rings?
I like the idea. But it would have to be annealed. Drilled and tapped. Then re-heat treated. And I am not sure you could ever get it back to the same condition. | |
|
  | |
Doc Sprocket
Site VIP


2018 Build-Off Entrant
2018 Build-Off Entrant
2021 Winner of Winners
2021 Winner of Winners
1st Place Build-Off 2016
1st Place Build-Off Winner 2016
Age : 51
Join date : 2013-04-21
Points : 7319
Posts : 2914
Location : Ontario Canada
 |  Subject: Re: Craftsman build. Subject: Re: Craftsman build.  April 17th 2014, 7:16 pm April 17th 2014, 7:16 pm | |
| To be fair, the shafts aren't very hard. Some are already drilled and tapped. In fact, the 930 I just broke had the input shaft tapped from the factory, and the replacement 930 did not. Since I prefer that, I switched shafts. It's like this- If the pulley is bolted on, I can reach up underneath with a wrench or socket, and get the pulley off easily. Try that with snap ring pliers. THAT is why I prefer it tapped, for what it's worth. That bumper looks VIOLENT!  | |
|
  | |
TheBeal
Veteran Member


Age : 30
Join date : 2013-06-06
Points : 5718
Posts : 1402
Location : Central PA
 |  Subject: Re: Craftsman build. Subject: Re: Craftsman build.  April 22nd 2014, 4:03 pm April 22nd 2014, 4:03 pm | |
| Well Ill talk to mr machine shop this week see what he says bout them axles. If they can do them Ill take em both peerless. Maybe the foote too.
Gone put some gussets in the spindles too. | |
|
  | |
TheBeal
Veteran Member


Age : 30
Join date : 2013-06-06
Points : 5718
Posts : 1402
Location : Central PA
 |  Subject: Re: Craftsman build. Subject: Re: Craftsman build.  August 22nd 2014, 9:10 pm August 22nd 2014, 9:10 pm | |
| Hrgablah... The craftsman isnt dead. Not yet. I couldnt do such a thing... ...however.... ..... ...it has gone down a slightly different path.... Can I bring back my own thread for the grave? | |
|
  | |
mr.modified
Veteran Member


2015 Build-Off Top 3 Winner
2015 Build-Off Top 3 Winner
2016 Build-Off Top 3 Winner
2016 Build-Off Top 3 Winner
2018 Build-Off Finalist
2018 Build-Off Finalist
2022 Build-Off Entrant
2022 Build-Off Entrant
1st Place Build-Off 2014
1st Place Build-Off Winner 2014
2023 Build-Off Entrant
2023 Build-Off Entrant
Age : 34
Join date : 2013-11-02
Points : 7170
Posts : 2910
Location : New Jersey USA
 | |
  | |
TheBeal
Veteran Member


Age : 30
Join date : 2013-06-06
Points : 5718
Posts : 1402
Location : Central PA
 |  Subject: Re: Craftsman build. Subject: Re: Craftsman build.  August 24th 2014, 7:53 pm August 24th 2014, 7:53 pm | |
| Errrm... yes. Pictures.... no. not yet... but maybe some "concept art" coming soon? lol
| |
|
  | |
Ariens YT11
Established Member


2014 Build-Off Entrant
2014 Build-Off Entrant
2015 Build-Off Entrant
2015 Build-Off Entrant
Age : 27
Join date : 2012-10-31
Points : 5165
Posts : 745
Location : The Wyo-Braska Panhandle
 |  Subject: Re: Craftsman build. Subject: Re: Craftsman build.  August 24th 2014, 10:26 pm August 24th 2014, 10:26 pm | |
| Whaat??? no pictires or it didn't happen!!
JKJK.
Can't wait. | |
|
  | |
TheBeal
Veteran Member


Age : 30
Join date : 2013-06-06
Points : 5718
Posts : 1402
Location : Central PA
 |  Subject: Re: Craftsman build. Subject: Re: Craftsman build.  August 29th 2014, 11:52 am August 29th 2014, 11:52 am | |
| Im not very far with this. Not far at all.... lol. So heres a bit of concept art! ...or maybe its just a slopily scratched out doodle... or... 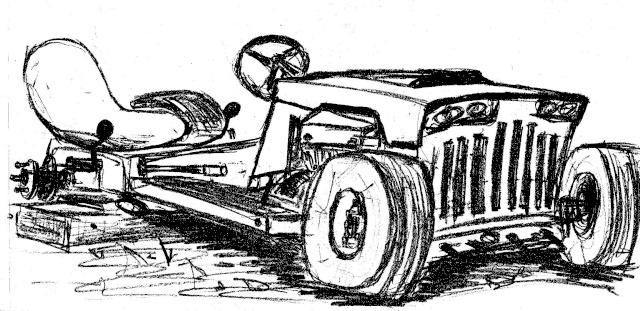 ...or whatever, there it is. | |
|
  | |
TheBeal
Veteran Member


Age : 30
Join date : 2013-06-06
Points : 5718
Posts : 1402
Location : Central PA
 | |
  | |
camomanusa
Member

2014 Build-Off Entrant
2014 Build-Off Entrant
Age : 25
Join date : 2013-09-15
Points : 4580
Posts : 467
Location : Greensburg, PA
 | |
  | |
redlinemotorsportts
Moderator


2014 Build-Off Entrant
2014 Build-Off Entrant
Age : 27
Join date : 2013-03-18
Points : 7484
Posts : 3131
Location : raleigh nc
 |  Subject: Re: Craftsman build. Subject: Re: Craftsman build.  September 12th 2014, 11:32 pm September 12th 2014, 11:32 pm | |
| Flip the front upright for speed. It will handle wayyy better. Id normally suggest a all custom go kart spindle'd front and with bearings..... buuuuut i know you arnt gunna do that. so set the front axle upright, and tight, direct steering. | |
|
  | |
TheBeal
Veteran Member


Age : 30
Join date : 2013-06-06
Points : 5718
Posts : 1402
Location : Central PA
 |  Subject: Re: Craftsman build. Subject: Re: Craftsman build.  September 13th 2014, 1:43 pm September 13th 2014, 1:43 pm | |
| Them parts there is just to get an idea of whats going on... Thats not the front I will be using, I am thinking about something with leaf spring suspension.
I would like to be able to hit 45mph if possible...
Dont know if my 3 and 4 speed 920s are up to that... I do have access to a 5 or 6 speed peerless somethingorother. And a 5 speed spicer.
Will be threading the end of the axle, building some hubs for 4 and/or 5 bolt wheels. Possibility of machining out the case for bearings and oil seals. Maybe brand new solid axle...
Thoughts? | |
|
  | |
Thunderdivine
Veteran Member


Join date : 2012-12-21
Points : 6544
Posts : 2101
Location : Norway, Europe
 | |
  | |
TheBeal
Veteran Member


Age : 30
Join date : 2013-06-06
Points : 5718
Posts : 1402
Location : Central PA
 |  Subject: Re: Craftsman build. Subject: Re: Craftsman build.  September 13th 2014, 8:48 pm September 13th 2014, 8:48 pm | |
| The front may actually end up a bit further ahead... If I can machine some on the trans, it will be upside down like that, Ide like the seat right over it. If it was upright, it would make it sit up too high I think.. I like a lower looking arrangement. Though, cant be too low... as my driveway eats things that are low to the ground... skid plates?Cut up the original craftsman fenders. Going to widen them so they fit over the tires. Might make them a bit longer by and inch or 2 so they fit a bit nicer... 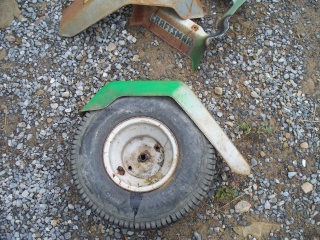 | |
|
  | |
RuggBateman
New Member


Join date : 2013-05-20
Points : 4217
Posts : 9
Location : Concord NH
 |  Subject: Re: Craftsman build. Subject: Re: Craftsman build.  September 28th 2014, 11:19 pm September 28th 2014, 11:19 pm | |
| oh boy, i just got some serious idea bulbs over my head for the next build... i'm digging this chop-n-channel and you have to keep the purple... | |
|
  | |
TheBeal
Veteran Member


Age : 30
Join date : 2013-06-06
Points : 5718
Posts : 1402
Location : Central PA
 |  Subject: Re: Craftsman build. Subject: Re: Craftsman build.  October 7th 2014, 11:34 am October 7th 2014, 11:34 am | |
| Got these 2 the other day. Dont have any real plan for them just yet... likely they will be for parts.  Both in a state of "Ill fix it later" I guess the guy just got another mower haha. The one wont steer. Rounded that out enough so it just skips the teeth. If I had a welder working, Id just cut up a few washers and weld em on there so it works. 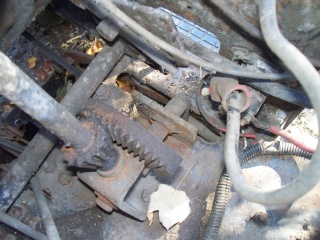 Thought about putting this push mower engine on the one... my cousin is looking for a cheap mower to take into the bush. 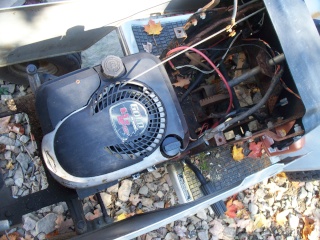 Painted the shroud for the 16.5hp oppy...  Too much ford... uggh. | |
|
  | |
LAWN MOWER MUDDER
Established Member


2014 Build-Off Top 3 Winner
2014 Build-Off Top 3 Winner
Age : 23
Join date : 2013-04-08
Points : 5210
Posts : 913
Location : Central Pa
 |  Subject: Re: Craftsman build. Subject: Re: Craftsman build.  October 7th 2014, 2:47 pm October 7th 2014, 2:47 pm | |
| In the picture of the steering box. The piece of shaft that sticks out the left side (in the picture) is your adjustment for that. If you take the clip or whatever off and put shims between the clip and the flat steel it will the two gears closer together. If you want a full rebuilt and really dependable steering box check THIS out. | |
|
  | |
redlinemotorsportts
Moderator


2014 Build-Off Entrant
2014 Build-Off Entrant
Age : 27
Join date : 2013-03-18
Points : 7484
Posts : 3131
Location : raleigh nc
 |  Subject: Re: Craftsman build. Subject: Re: Craftsman build.  October 7th 2014, 7:12 pm October 7th 2014, 7:12 pm | |
| If you were gunna part the craftsmans out, i'd make one from two and have plenty of parts left. Then sell or work it. | |
|
  | |
Sponsored content
 | |
  | |
| | Craftsman build. |  |
|


