I thought I would write this up separately from my build thread to serve as yet another example for other's benefit.
I originally had that same dashboard throttle/choke control that most mowers come equipped with, and it's just gotta be dealt with first. You don't want it choking out every time you mash the gas!
In this case, the engine was an OHV Briggs single. I began by taking the cable casing retainer clip off the governor slide end of the cable, and unhooking the cable from the plastic cable block. I will show what it looks like before and after.

There's the stock setup. Sorry for the blurry pic. Too late to re-shoot! Note the wire loop that is the choke control. You will have to get rid of it. I simply clipped it with a wirecutter.

Here's the governor mechanism with the cable, casing, clip, and choke wire off.
I then ran the factory control cable directly to the choke control arm on the "outside" side of the carb. Originally, the choke wire pushed. We need it to pull- hence, switching sides.

There's the new choke setup. My phone sucks. I'll take a better image and swap it out later. There was already a hole in the choke arm for the cable, and a bracket nearby for the cable casing clip, So- this whole job was bolt-on.
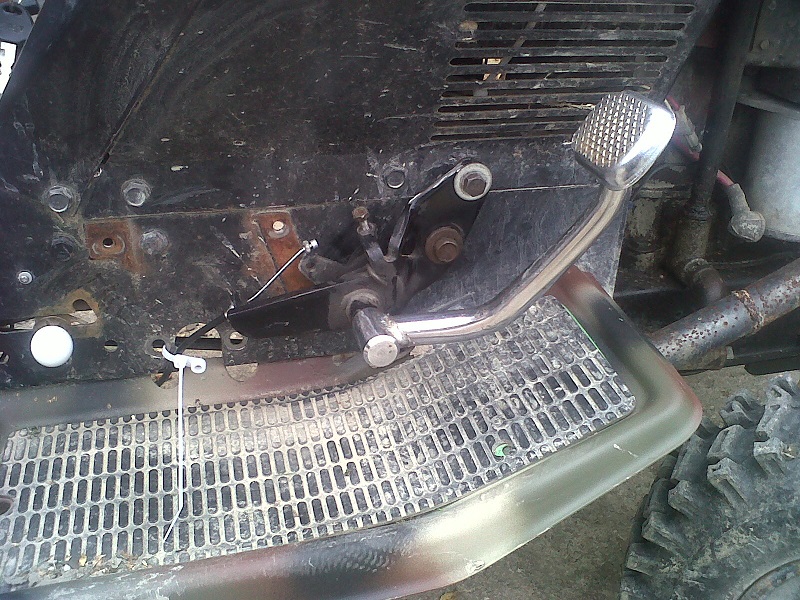
The next step involved mounting the motorbike brake pedal. For me, it was an easy two bolts in the side of the tunnel. Obviously, this part depends on what YOU use. In the interest of safety, I prefer NOT to use a bicycle brake handle as others have done, because there's no return spring and it might be tough to rig one I have seen a few that DO have them though.

Here's the pedal mounted. I found it easiest to just weld a nut to the arm to run the cable through. The nut is small enough to grab the cable end swage and pull on it. Looking closely at the pic, you might be able to spot the coiled return spring and the adjuster screw. For the cable, I used a universal bicycle brake cable kit from Walmart (or was it Canadian Tire). It was nearly 6' long, plenty.
I routed the cable through a big loop under the tunnel, and back forward to the governor slide. You don't want any sharp corners or kinks in the cable, and you DO want to secure it in several places with zipties or something. Beware of moving parts.
After offering the cable up to where it needs to go, I marked and cut the casing with a grinder. If the cable is still inside the casing, remove it, cut the casing then run the cable back in. I secured the casing to the original spot using another cable casing clip I had. If you don't have another, you can use a metal cable clip, a large washer and bolt, or even a piece of all-round strapping folded over the cable and bolted in.
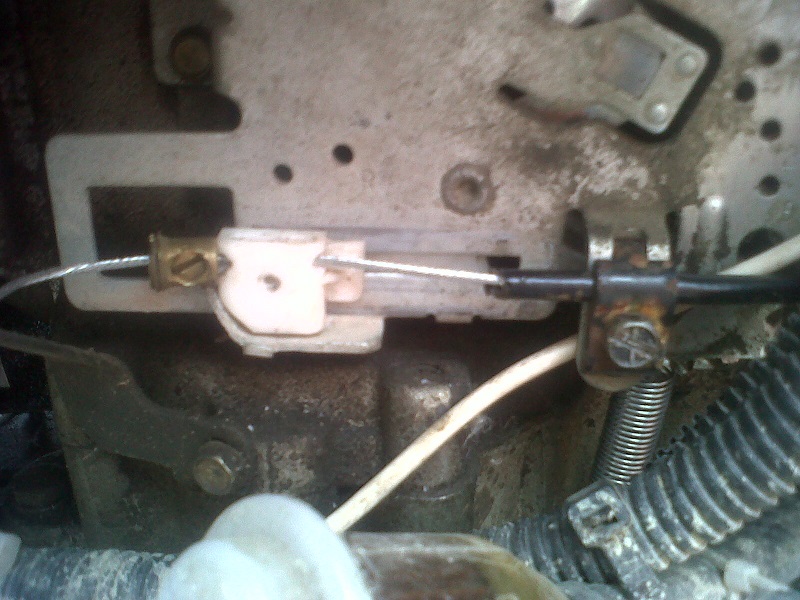
How to attach a flexible cable to that STUPID plastic slide? (I hate Briggs for this!) Well- I simply drilled a small hole on each end of the slide and ran the cable right through it! Now, you have to attach a cable stop, to make the cable grab the plastic block when you step on the pedal. For cable stops, I like to use the brass insert from older-style Marrettes. These are "wire nuts" that electricians use to connect wire together. The older ones have a brass insert with a set screw, covered by a plastic cover. I toss the cover and just use the insert. You can use a small cable crimp, but if you need to adjust it, you're screwed.

Here's the new setup. You can see where the new control cable passes right through the plastic cable block. It makes for a dead-straight cable pull that will not twist or break the plastic. Shown also is the cable stop. At this point you'll have to trim the excess cable off. Look again, and you'll also see the return spring I added. Again, avoiding any undue stress on that miserable plastic block. Having looked at the mechanism, I found the metal arm that is behind the control plate that has a hole in it (convenient for a spring). When you slide the block, this arm swings up and forward. I took a small spring I had laying around and let it hang. I re-used a section of the wire choke loop to attach the spring to a mounting point on the frame. Move the throttle a few times to make sure nothing hangs, and you're good. Almost there!
Before starting the engine, I checked the pedal's cable pull. You have to make sure that pushing the pedal pulls the slide full open (or you won't get full throttle) and returns ALL THE WAY to idle when you let off the pedal. I had to make an adjustment to the screw on the pedal, but it went easy. Adjusting the casing position in the clamp allows some room too. Now, with the brake on (safety) and in neutral, I started the engine and nursed it till it was warm. I made a slight adjustment to bring the idle where I wanted and blipped the pedal a few times to verify operation. All good.
The test drive was fun, and it was nice to have the controls the way they SHOULD be!


