|
| | Make your own front 4 wheel drive axle? |  |
|
+4Destructive mr.modified TheBeal prancstaman 8 posters | |
| Author | Message |
|---|
prancstaman
Veteran Member

Join date : 2015-02-02
Posts : 1412
 |  Subject: 2nd rim jig Subject: 2nd rim jig  January 22nd 2020, 10:23 pm January 22nd 2020, 10:23 pm | |
| Hay People, The planets aligned so the goose layed her egg. Which gave me time to do some work on this, LOL. I need something to hold my hand grinder so I can true up the rims and cut rims up later on. I'm using my best hand grinder for this, the shaft doesn't wobble on it in other words, LOL. I pick through my best junk for this, the junk on the bench in other words. 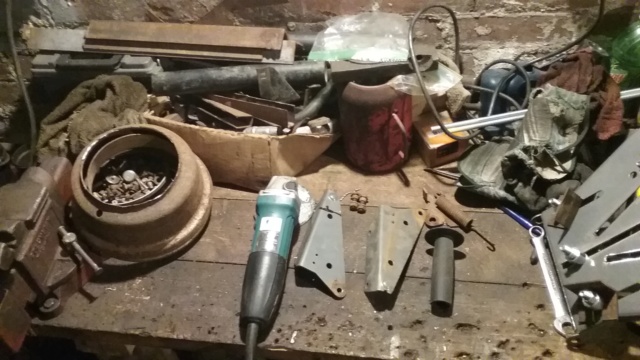 I mount the side handle on. Then grab the seat brackets and use one to fit it on the hand grinder, then slice it up to fit snug. The bolt on the bracket fits under the grinder handle for support. The hole next to the bolt is where I will mount the assembly to a rod and will swing into the rim. 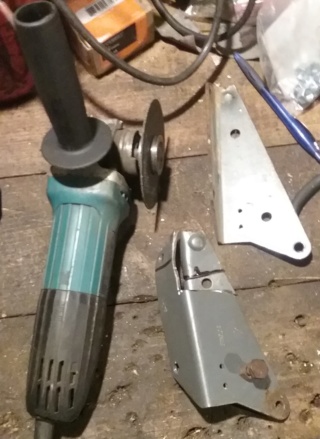 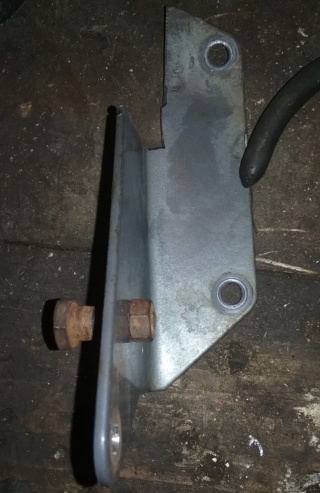 The side handle screwed on is the only thing holding the bracket on while the bolt up under the bracket is just there to help support the hand grinder under the handle. 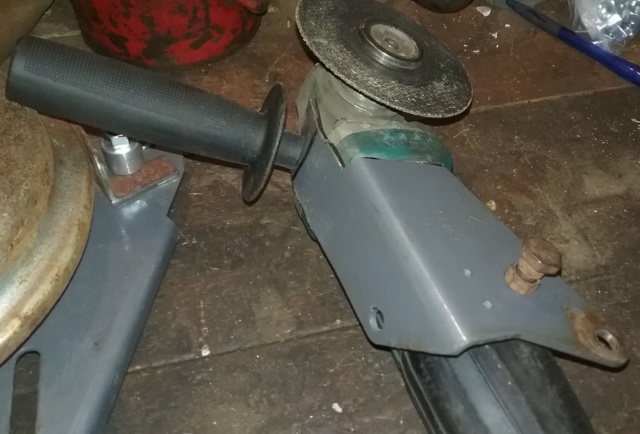 A better view of under the hand grinder handle with the bolt bolted to only the bracket. Should keep the hand grinder from vibrating while running. 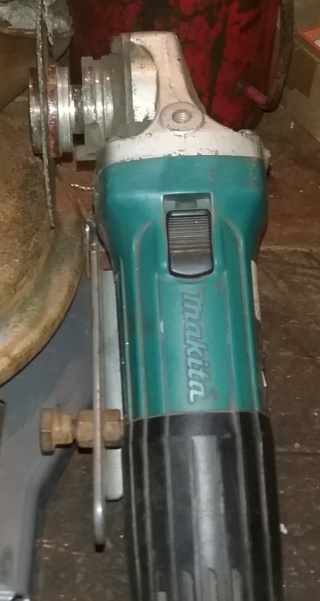 I will cut up a threaded rod for it to come up from the rim holding jig and will support the hand grinder with a cut off wheel, that will swing into the rim. Here are the pieces I use. A couple of alternator spacers, various size spacers and washers, a couple nuts, and a 13 inch long piece of threaded rod. 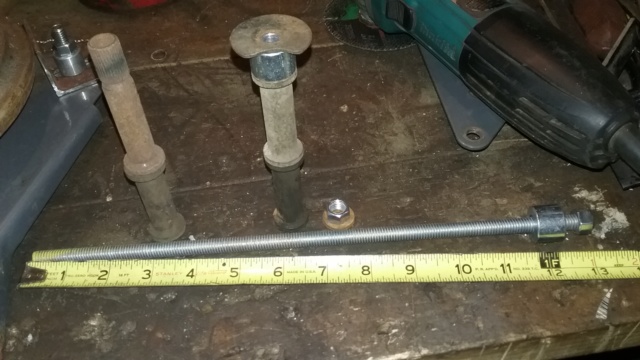 I piece it all together. The hand grinder will be able to be adjusted with it's height by rearranging the spacers, washers, and hand grinder bracket. When I tighten the threaded rod tight, I still can swing the hand grinder into the rim. The setup seems to be stable but with some effort the fixture will flex. Improvements on it will be later but for now and for the most part the assembly works. The threaded rod can be moved in different spots on the rim jig for different rims and I can also just drill another 3/8" hole if needed too. 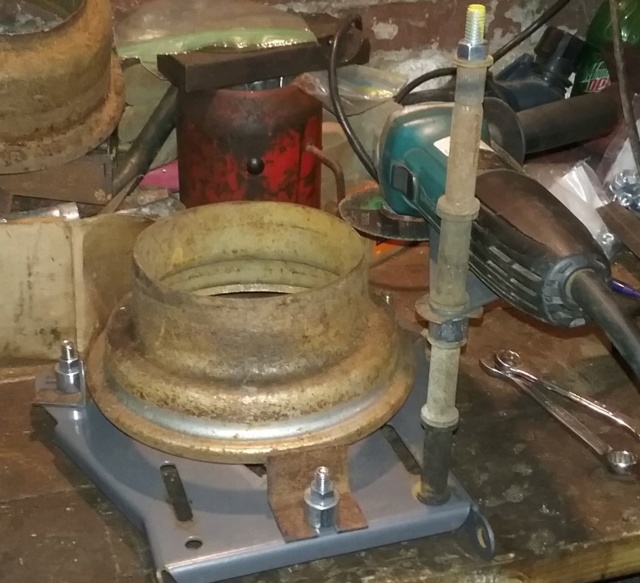 I do a test run now by just scribing a line in the rim all the way around. Worked pretty good. The rim jig needs to be mounted to something so it doesn't move to free up the hand holding it in place. Then I can use one hand to push the hand grinder into the rim and the other hand to spin the rim. For now, I set the cutoff wheel on the rim, turn the grinder on and spin the rim to make a mark all the way around. 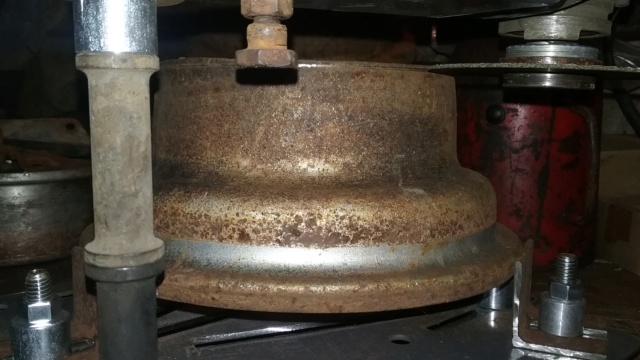 And the end result. Cool, it works, LOL. 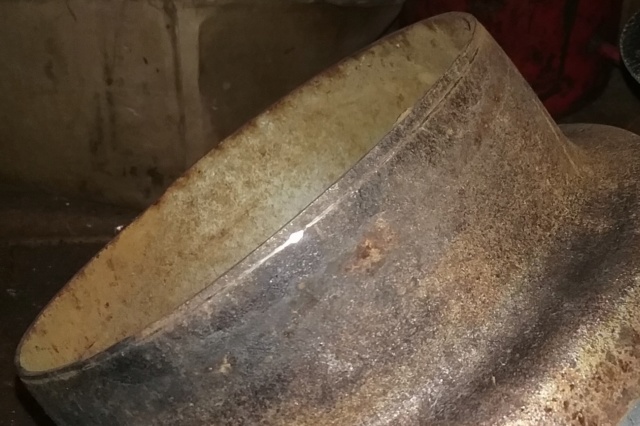 That's as far as I got for tonight. I'll true up the rim halves later. Even if these 2 jigs self-destruct doing these rims, this will give me experience and know how on doing it for improvements later. After I true up the rims, the next jig will be to roll up some flat stock steel to widen the rims some. I think you call it "Rim Banding". OK, that's it for now. | |
|   | | prancstaman
Veteran Member


Join date : 2015-02-02
Points : 5096
Posts : 1412
Location : Cleveland,Ohio
 |  Subject: True up the rim halves Subject: True up the rim halves  January 25th 2020, 8:37 pm January 25th 2020, 8:37 pm | |
| Hay People, I slice and diced them up. As far as I can tell the jigs worked great for trueing up the rim halves. Definitely need some improvements on the jigs, like a way to push the grinder into the rim by a spring or something. A little grease on the bolts that ride on the rim bead, I had to use both hands to turn the rim. So to cut the rims, I pushed the grinder with a cutoff wheel into the rim till it cut into the rim alittle bit then spun the rim with both hands. The cutoff wheel would cut the rim until the cutoff wheel wore down and would have to push the cutoff wheel into the rim alittle more, then spin the rim with both hands till it wore down again, and so on. Doing all this though took only a couple minutes. Was well worth the time it took to do this. I took a lot of pics too, 14 in total, LOL. First rim. I redid the bolts and brackets that held the rim in place to fit in the jig better. Had to move one of the brackets to a different spot because a spacer was in the way. 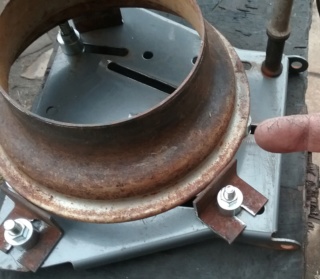 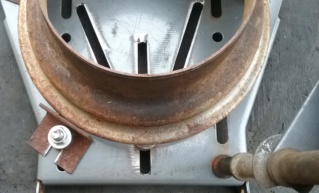 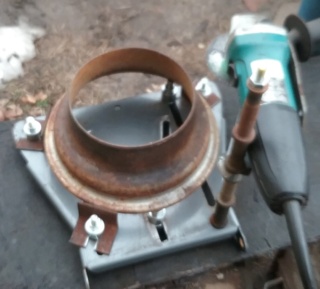 Sliced it up like I said I had to do it. And the piece I cut off and the end result of the rim. 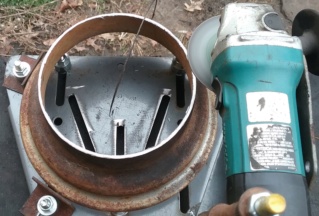 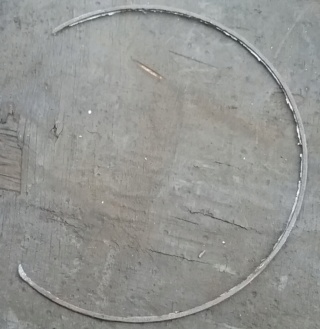 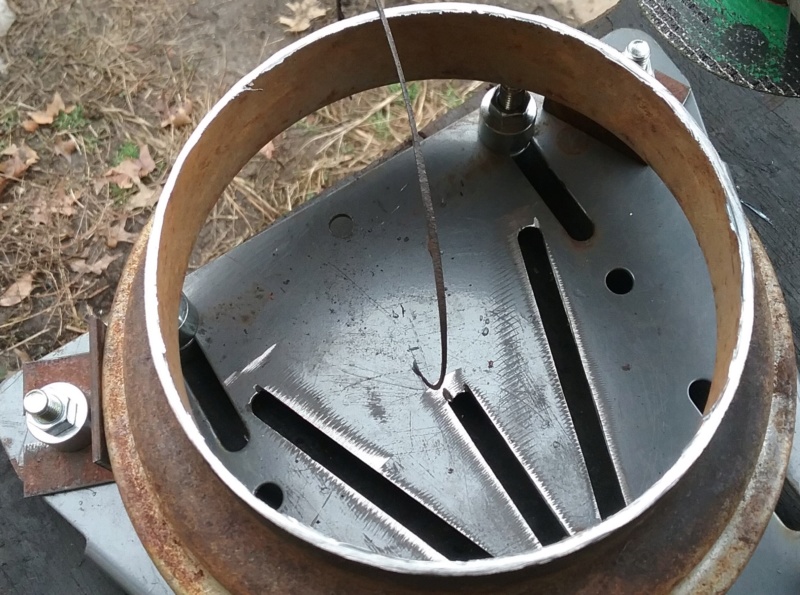 The 2nd rim. Did this the same way and right after the first rim half. So the same height as the first rim also. Since they both are the same sides of the 2 whole rims they need to be identical for the right spacing. 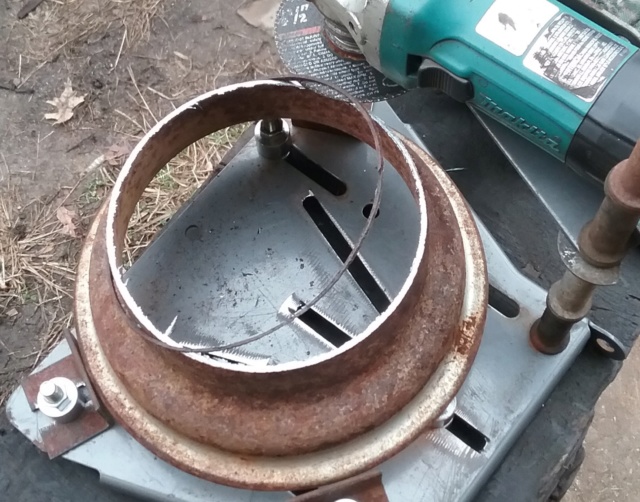 3rd rim half. I reconfigured the jigs to do the other 2 rim halves. Reset the bolts and brackets to hold the rims in the jig. Then I readjusted the height of the cut off wheel with just adding a washer to the height. The washer was 1/16th of an inch so the height of these next 2 rim halves will be 1/16 of an inch higher then the first 2 halves. I wanted to cut off as little as possible on these next 2 halves. 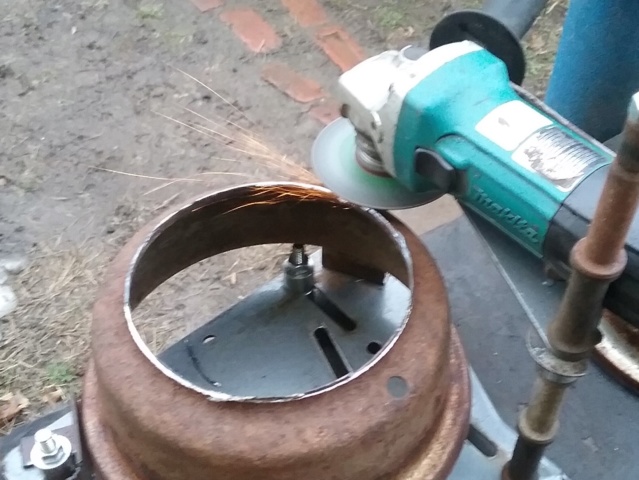 And the 4th rim half. The end result. 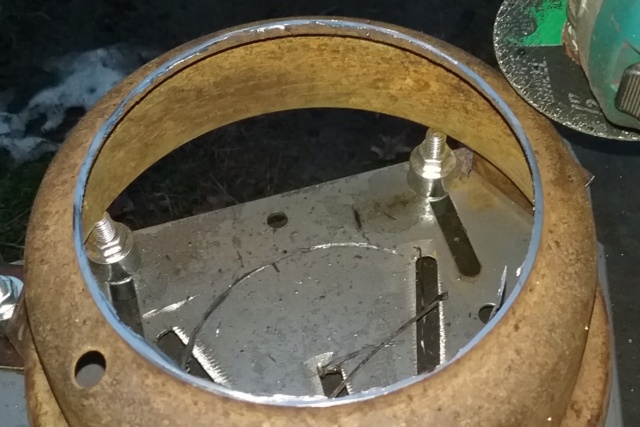 All 4 halves done! 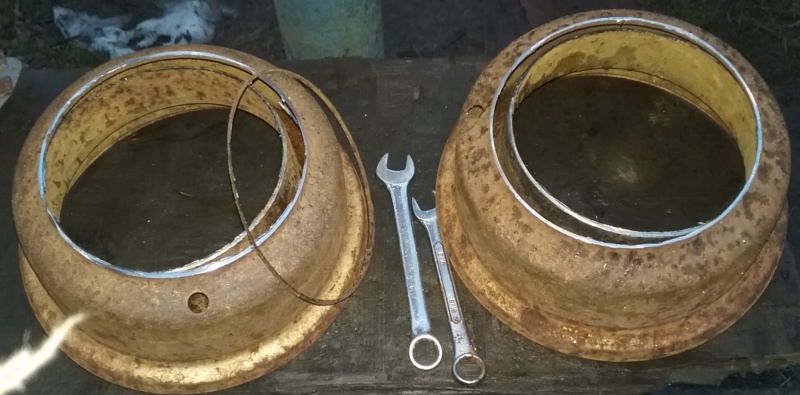 Here is everything I cut off. Just by the looks of the pieces I think the end result looks promising. 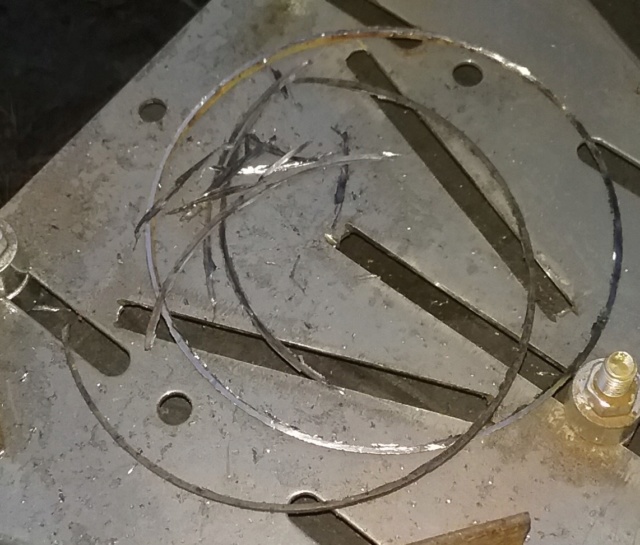 Since I used a cut off wheel on these, that left a lot of burrs on the edges. A rat tail file is used to clean the edges up. Time for some QC of the work done. I won't be measuring anything. Just going to use visuals and that should be good enough. You'll see! LOL. I place the rims together, on top of one another on how they will go together. Then place a light behind where the cuts are. The light don't lie. Any gap and the light will shine through. 1st complete rim put together. Took a minute to get this pic. That is the most light I could get to shine through. 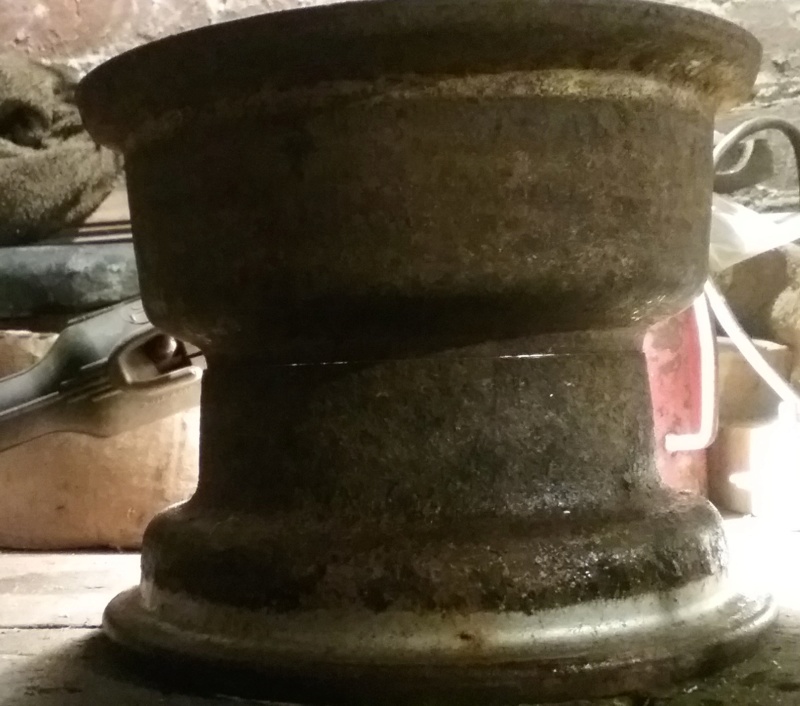 2nd complete rim put together. Same thing. 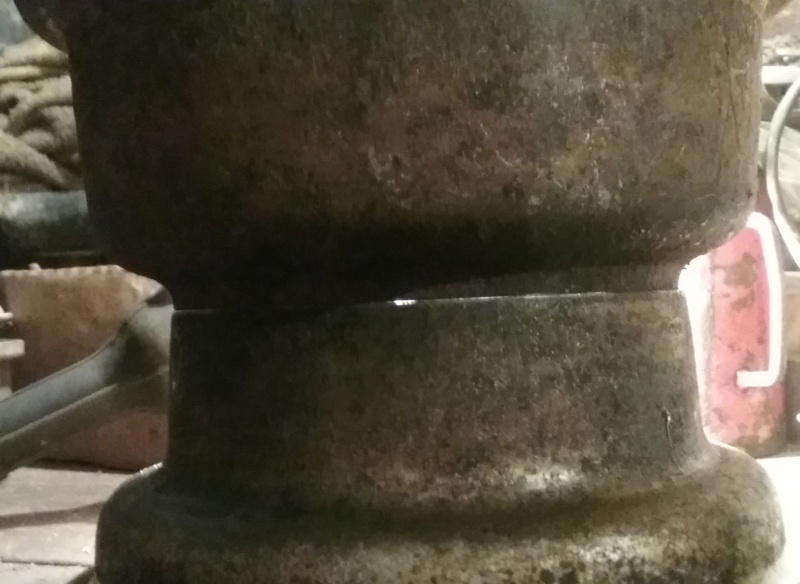 So, after cutting out the hubs completely, trueing up all 4 rim halves, the end result of all this is that the rims when set together have a width of 6 1/4 inches wide.  6 1/4 inches wide is not too bad. Yesterday, I went to Home Depot and got some flat stock steel. I got 2 pieces, a 1 inch wide and a 1 1/4 inch wide. I think I will use the 1 1/4 inch flat steel stock to widen these rims to 7 1/2 inches wide, but I might just go and get a 2 inch wide piece just for kicks. I think I'll measure a rim up that is whole first to see exactly how wide a standard rim is and then make the call on how wide to make these. I want mine to be wider then a standard rim, just because I can, LOL. To do this, roll the steel, I need to make the tool. The steel roller will be used for other projects also, not a dedicated jig just for this project. So I will be posting this build of the steel roller in another thread. Guess which one, LOL. OK, that's it for now... Later. | |
|   | | AllisKidD21
Moderator

2020 Build-Off Entrant
2020 Build-Off Entrant
1st Place Build-Off 2019
1st Place Build-Off Winner 2019
Age : 25
Join date : 2016-07-10
Points : 8587
Posts : 5190
Location : Ontario Canada
 |  Subject: Re: Make your own front 4 wheel drive axle? Subject: Re: Make your own front 4 wheel drive axle?  January 26th 2020, 10:58 am January 26th 2020, 10:58 am | |
| Looks like that jig you made worked out pretty well, nice job prancstaman!  "This'll either wake you up or put you to sleep forever!"- Red Green "Whatever you do you should do right, even if it's something wrong." - Hank Hill - MTD Off-Road Build
- Ford LT 110 Off-Road Build
- Craftsman GT 6000 Off-Road Build
- Sears LT11 Rat Rod Build *2019 Build-Off Winner!* Garden Tractor Collection: Allis B-110 x2, 710, 716, & 410 - Wheel Horse 655, 953 & 500 Special - Case 444 - Bolens Versamatic, G10 & 1668 Diesel Swapped - Cub 106, 124 & 1000/149 Frankentractor - Ford 120, LGT 125 & 145 - White 1650 Yard Boss - Moto Mower 710-100 | |
|   | | prancstaman
Veteran Member


Join date : 2015-02-02
Points : 5096
Posts : 1412
Location : Cleveland,Ohio
 | |   | | prancstaman
Veteran Member


Join date : 2015-02-02
Points : 5096
Posts : 1412
Location : Cleveland,Ohio
 |  Subject: Making a set of 2 inch bands for the front rims Subject: Making a set of 2 inch bands for the front rims  March 28th 2020, 10:43 pm March 28th 2020, 10:43 pm | |
| Hay People, Finished my work early which gave me time to work on this project. I got my "Behind the 8 Ball steel roller" working OK, lets see if I can make some steel rings for the widening of these rims. I will be widening the rims from 6 1/4 to 8 1/4 inches with 2 inch wide flat steel stock. 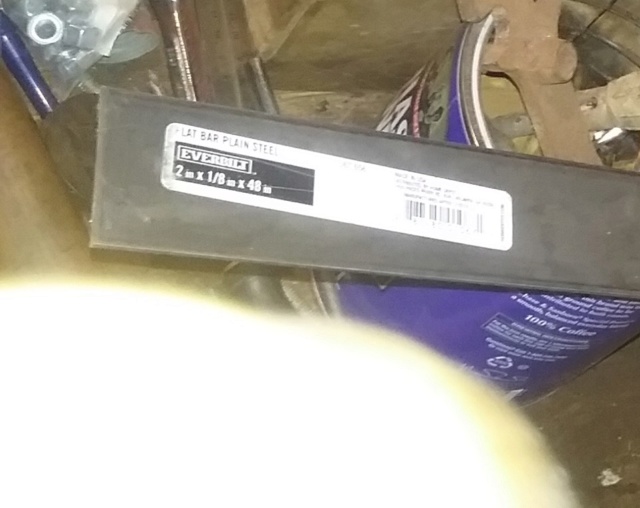 I wrap a measuring tap around the rim to see if the 4 foot piece will do both rims. Measures around 20 inches. Then there will be 2 inches of wasted metal on each end of each piece of rolled steel, which is 4 inches of wasted material. So I need a piece of flat steel that is 24 inches long, 2 feet in other words. My piece of steel is 4 feet long, so I'll cut it in half and will be long enough for 2 pieces. NICE!!  OK, doing the actual rolling is probably not what you are thinking. What you are probably thinking of the outcome of me rolling the metal plate on my tool I made, the outcome of a perfect ring will not happen. The metal roller does make perfect rings, if I was using sheet metal for this which is easy to bend. But I am using steel plate and is way harder to get a prefect ring. Even if I spent the money and bought a professionally made tool, the outcome would be the same. To get a perfect ring, I would have to roll the metal onto itself towards the end of the rolling. Pretty much impossible with steel plate. What will be achieved is a coil like shape wound in an even curl so I can bend it into shape with minimum effort and will bend evenly all the way around when doing it. I pretty much bend it close to shape and then finish bending it with my hands to finish the shape. The final bending will be done when I weld the pieces together on the rims. You'll see, LOL. On to the rolling..... I mount the steel in the roller and start rolling back and forth. Cranking on the bottom wheel a couple twists and rolling back and forth. So far, so good. 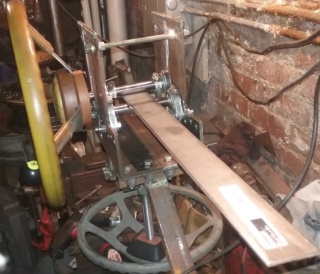  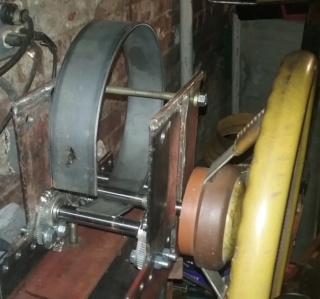 So far a 9 inch ring. Nice and even curl to it too. 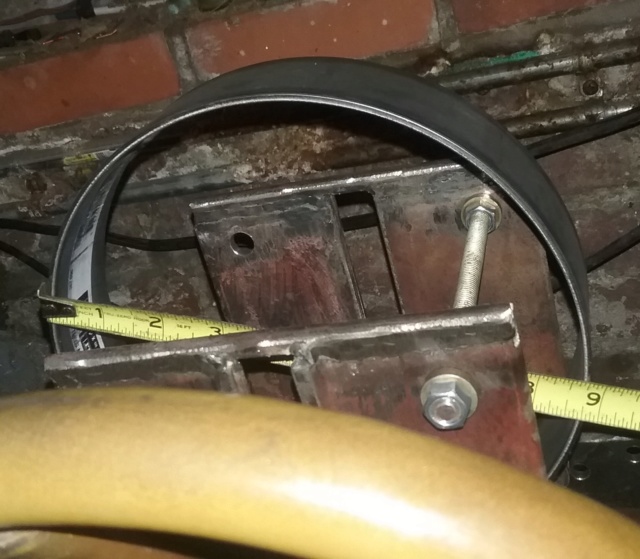 The flat spots are the worst to deal with. I get a small of a curl to roll the end under the rollers to make a smaller curl but I can't get to the end on one side. I do manage to get a smaller then what I need curl. It is easier to unroll a curl evenly then it is to bend it sharper evenly. 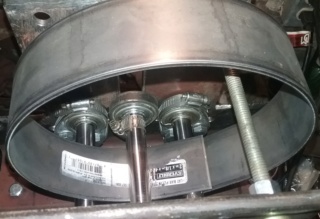 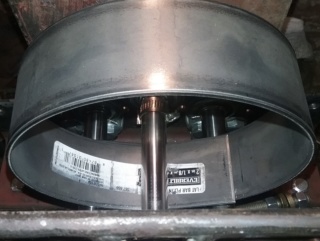 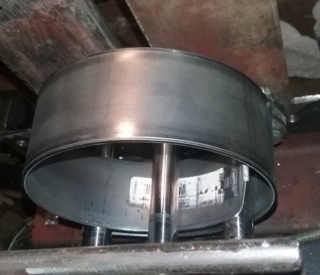 Here is the outcome of the first rolled piece of steel. It's not good but it's not bad either. Definitely a workable piece though. The roundness of it is even and working the metal is something I can do. No way could I get a nice enough piece like this from just bending it around a pole free handed, no way. 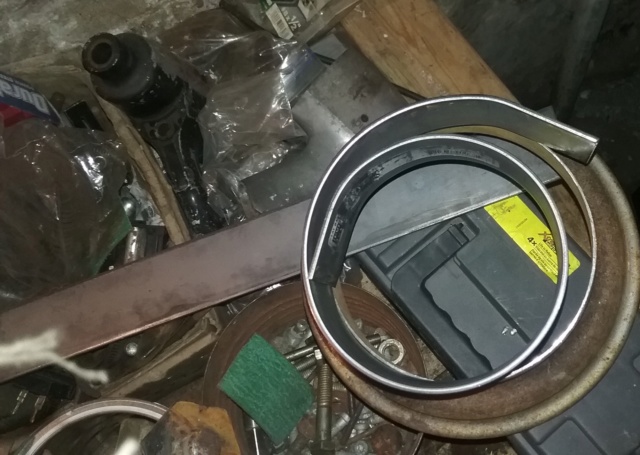 I do the second piece and I get better at it. I roll the ends differently on this one and make it more evenly curled. Getting better with experience. 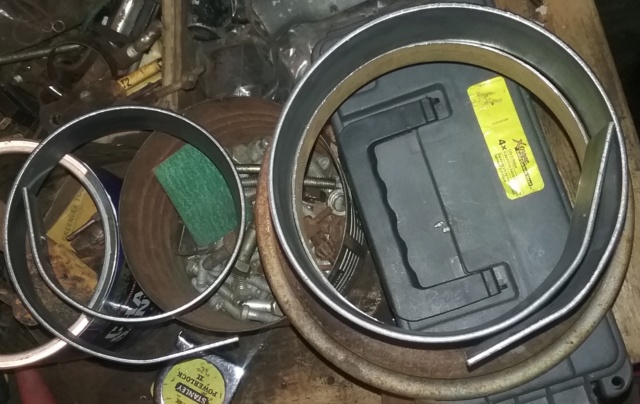 OK, a little mockup for motivation. Definitely cool, LOL. 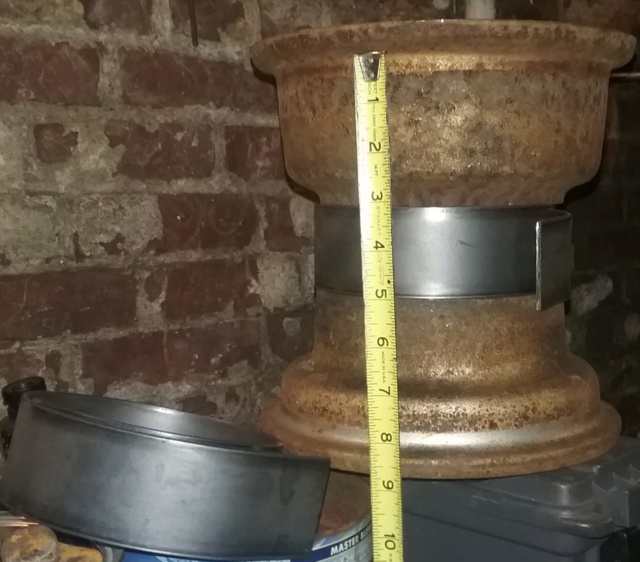 8 1/4 inches wide, as ordered. 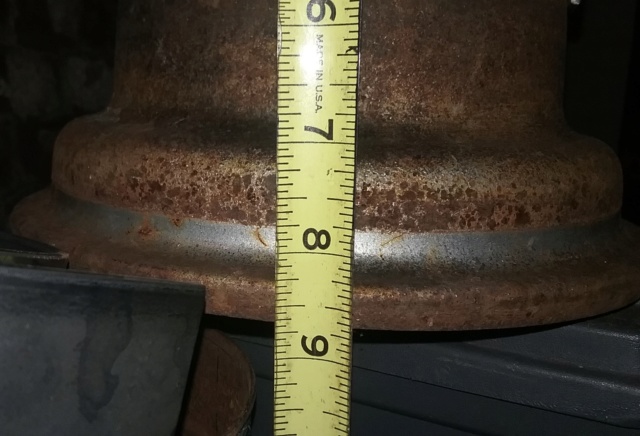 I can't be more happier with the outcome of both pieces. I can work the rolled steel with little effort now. The "Behind the 8 Ball Steel Roller" worked great. When I get to welding the rims up, the outcome of the surface will be a smooth curve and not a lumpy surface with flat spots on it. I'll weld the rims up when I get all the pieces made for them. Next step is to make something that makes the hubs of the rims. Need the hubs to fit in the rims and bolt to the wheel bearings. This will be another tool I need to make and will be on this thread since this is the only thing it will do. | |
|   | | RichieRichOverdrive
Moderator


2018 Build-Off Entrant
2018 Build-Off Entrant
2024 Build-Off Entrant
2024 Build-Off Entrant
Age : 22
Join date : 2016-10-29
Points : 7221
Posts : 4020
Location : Lewisburg, KY
 | |   | | prancstaman
Veteran Member


Join date : 2015-02-02
Points : 5096
Posts : 1412
Location : Cleveland,Ohio
 | |   | | prancstaman
Veteran Member


Join date : 2015-02-02
Points : 5096
Posts : 1412
Location : Cleveland,Ohio
 |  Subject: Finishing of 1 band Subject: Finishing of 1 band  April 20th 2020, 10:04 pm April 20th 2020, 10:04 pm | |
| Hay People, I wanted to finish off making a band enough to see the outcome. So, grabbed a band and a set of rims. 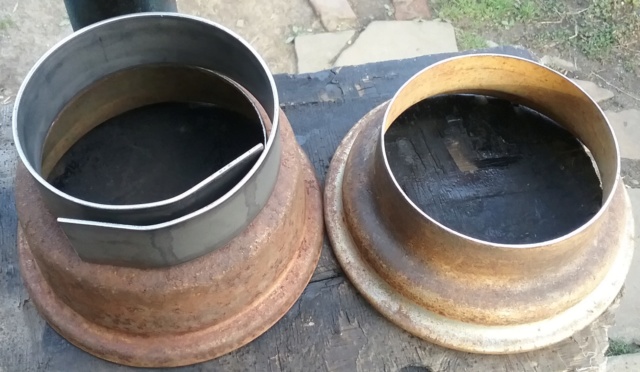 I trim one end off using a square, then the other end the same way.  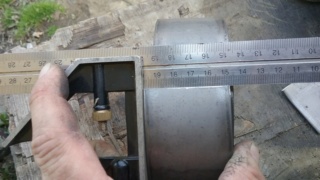 With a little trimming, I guess my tool can make a pretty good ring. 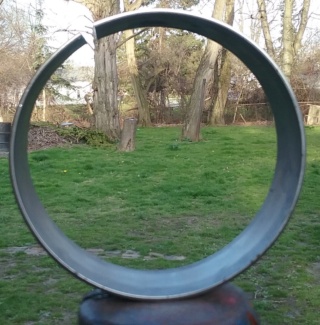 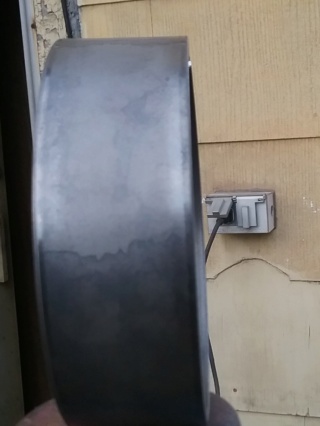 Next, is to trim to the size of the rims. Bending, pushing, grunting, you know. LOL. 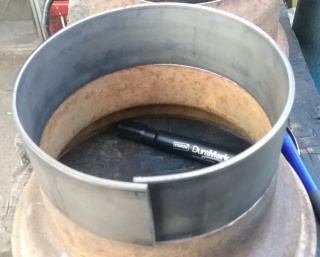 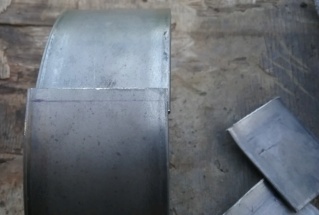 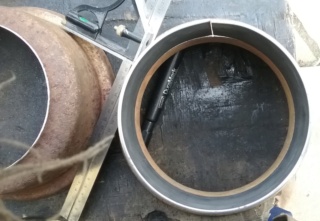 I got the band close to size by trimming. Here is what is wasted from a 2 foot piece of steel. 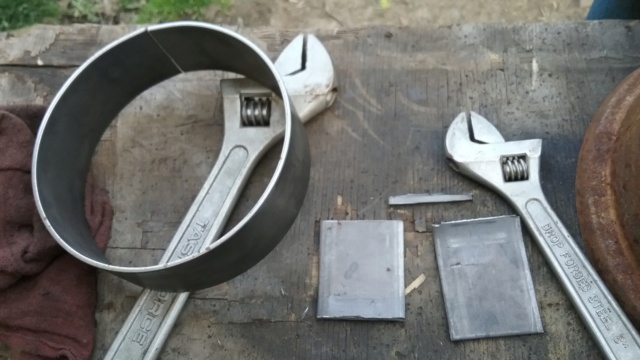 Next, I want to put 1 tack weld on the band to hold it together. I lay the band on the rim, lay the ground on top and tack it up. NOPE! The ends don't line up. I thought laying it on the rim would give it a flat spot to line up the halves, but NOPE. So tacking it in place this way is a no no, LOL. 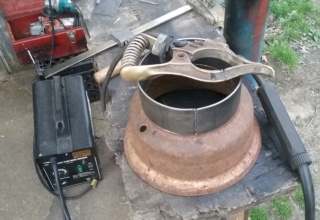 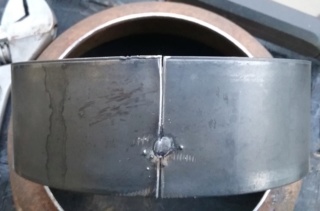 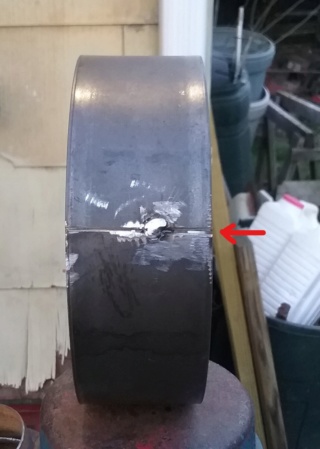 I grind the tack weld off and clean the metal up for try #2. Took about 15 minutes to figure out another way. 2 pieces of steel with the band sandwiched between them. Worked pretty good for what it was.   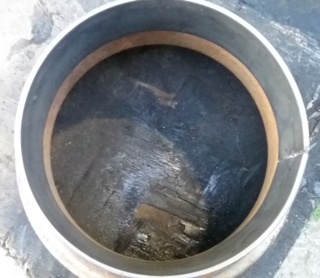 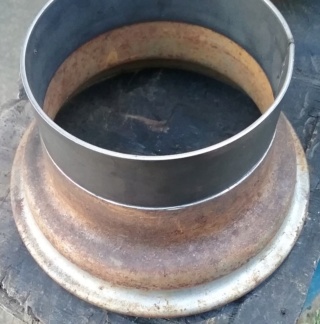 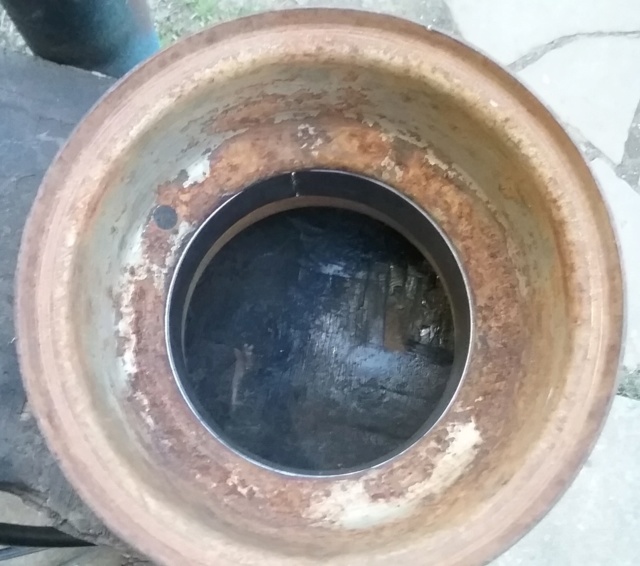 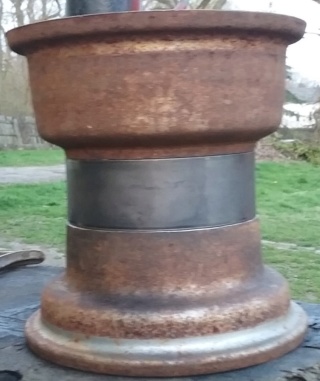 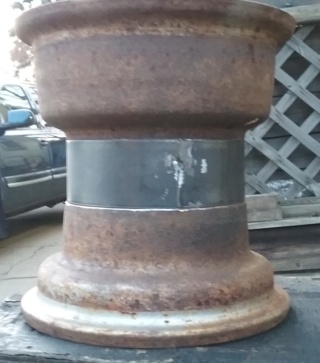 I need to do the other band next. I might weld a little bit more of the seam then flatten it out with a grinder and run the band through the roller some more since it is a ring now. See if I can make it better, LOL. The tack welded area is not perfectly curved. I'm still trying to think of a simple way to make the hubs. Got a plan but isn't a good way of doing it yet. I'll figure it out, no worries. OK, almost my bedtime, Later. | |
|   | | prancstaman
Veteran Member


Join date : 2015-02-02
Points : 5096
Posts : 1412
Location : Cleveland,Ohio
 |  Subject: Re: Make your own front 4 wheel drive axle? Subject: Re: Make your own front 4 wheel drive axle?  April 21st 2020, 8:22 pm April 21st 2020, 8:22 pm | |
| Hay People, I ordered the tires. Basic V tread design but they are not aggs. A little bit flashier tread on them. Since these are for a 4X4, all 4 tires are the same size. 18 X 9.5 X 8. Check them out. 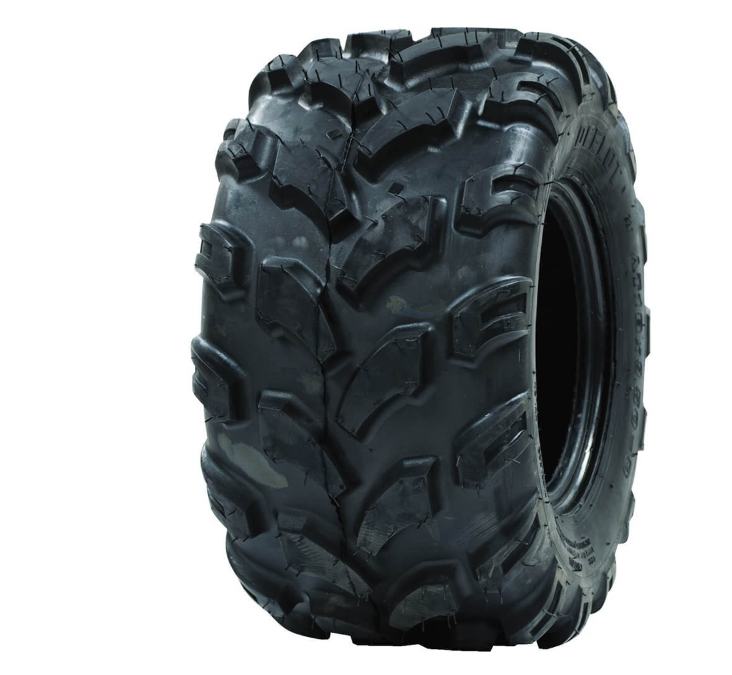 | |
|   | | prancstaman
Veteran Member


Join date : 2015-02-02
Points : 5096
Posts : 1412
Location : Cleveland,Ohio
 | |   | | mr.modified
Veteran Member


2015 Build-Off Top 3 Winner
2015 Build-Off Top 3 Winner
2016 Build-Off Top 3 Winner
2016 Build-Off Top 3 Winner
2018 Build-Off Finalist
2018 Build-Off Finalist
2022 Build-Off Entrant
2022 Build-Off Entrant
1st Place Build-Off 2014
1st Place Build-Off Winner 2014
2023 Build-Off Entrant
2023 Build-Off Entrant
Age : 34
Join date : 2013-11-02
Points : 7169
Posts : 2910
Location : New Jersey USA
 |  Subject: Re: Make your own front 4 wheel drive axle? Subject: Re: Make your own front 4 wheel drive axle?  May 22nd 2020, 12:47 pm May 22nd 2020, 12:47 pm | |
| Hey that's a pretty top notch looking job on those rims! Especially for bending them around yourself from a flat piece of steel. Tires look pretty nice too, too bad they're out of stock for awhile. | |
|   | | prancstaman
Veteran Member


Join date : 2015-02-02
Points : 5096
Posts : 1412
Location : Cleveland,Ohio
 |  Subject: Re: Make your own front 4 wheel drive axle? Subject: Re: Make your own front 4 wheel drive axle?  May 22nd 2020, 6:55 pm May 22nd 2020, 6:55 pm | |
| @mr.modified Thanks. Plan to weld up the seam and run the ring through one more time to get rid of the 2 flat spots for the seam. No problem waiting on tires, the price is right and be a while before I need them. | |
|   | | prancstaman
Veteran Member


Join date : 2015-02-02
Points : 5096
Posts : 1412
Location : Cleveland,Ohio
 |  Subject: Re: Make your own front 4 wheel drive axle? Subject: Re: Make your own front 4 wheel drive axle?  May 28th 2020, 9:38 pm May 28th 2020, 9:38 pm | |
| Hay People, Got all 4 of them. Ordered from Amazon. Payed a few dollars more but they had them. 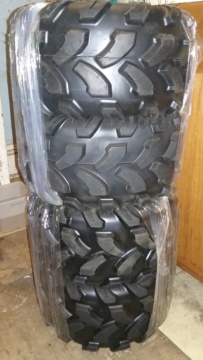 I'll take a closer look later, too busy and tired right now. Later...... | |
|   | | Creepycrawler
Established Member


2024 Build-Off Entrant
2024 Build-Off Entrant
Age : 37
Join date : 2013-07-02
Points : 5019
Posts : 731
Location : Logan Ohio
 | |   | | prancstaman
Veteran Member


Join date : 2015-02-02
Points : 5096
Posts : 1412
Location : Cleveland,Ohio
 |  Subject: Re: Make your own front 4 wheel drive axle? Subject: Re: Make your own front 4 wheel drive axle?  May 31st 2020, 9:53 am May 31st 2020, 9:53 am | |
| - Creepycrawler wrote:
- I love the rim jig and roller, the wide wheels are coming out really good, it’s gonna be cool
Thank You!! Think I got 2 more tools to make to finish the rims. Next tool is to make a hub for the wheel bearings of the axle. Then a jig to weld them all together. I'm even building a scratch start TIG so I can get air tight welds on the rims. | |
|   | | Sponsored content
 | |   | | | | Make your own front 4 wheel drive axle? |  |
|
Similar topics |  |
|
| | Permissions in this forum: | You cannot reply to topics in this forum
| |
| |
| | Who is online? | In total there are 79 users online :: 0 Registered, 0 Hidden and 79 Guests
None
Most users ever online was 412 on January 7th 2023, 7:59 am
|
|


